Feature
- VISIT YAMAGATA
- Feature
- [Activity] Shippo-yaki Accessory! Make your own cloisonne enamelware
[Activity] Shippo-yaki Accessory! Make your own cloisonne enamelware
Shippo-yaki, or cloisonne enamelware, is a craft often used in making Buddhist treasures. The glossy and shiny beauty has a mysterious charm that makes you feel happy just by looking at it.
I learned that there is a workshop in Yamagata City where I can make such cloisonne ware by myself so I went with my elementary school-aged son to try to make something original.
In the hands-on classroom, you can experience everything from coloring and designing to baking in a high-temperature furnace at 800°C.
This time, I would like to introduce the charm of such a cloisonne enamelware making experience.
Introduction
Cloisonne enamelware
It is a traditional craft of spreading glass glaze (“yuyaku” or “uwagusuri”) on a metal base and baking it at a high temperature of 800 to 900°C.
The golden mask of Tutankhamen in ancient Egypt in the 14th century BC was made using this technique that has a long history throughout the world.
Even in Japan, it was used in the Edo period for decorations such as sword guards, fusuma (sliding door) pullers, and hiding nails for castles and temples. When new glazes were developed after the Meiji era, it spread among the common people.
Cloisonne enamelware is still loved by many people today and found in items like vases with striking vibrant colors and accessories such as brooches and pendants that express a unique three-dimensional effect and texture.
Yet cloisonne enamel ware is not very familiar to most people. You even may have worn some without your knowledge.

These are the school emblem and grade emblem that I wore on the chest and collar of my uniform when I was a student —
In fact, they are made with cloisonne enamelware. It is actually one of the most familiar crafts for many Japanese people.
Shonai-ya Kobo Kujaku
There is a workshop in Yamagata City where you can easily make your own cloisonne ware.
That is — “Shonai-ya Kobo Kujaku” in Hatagomachi.
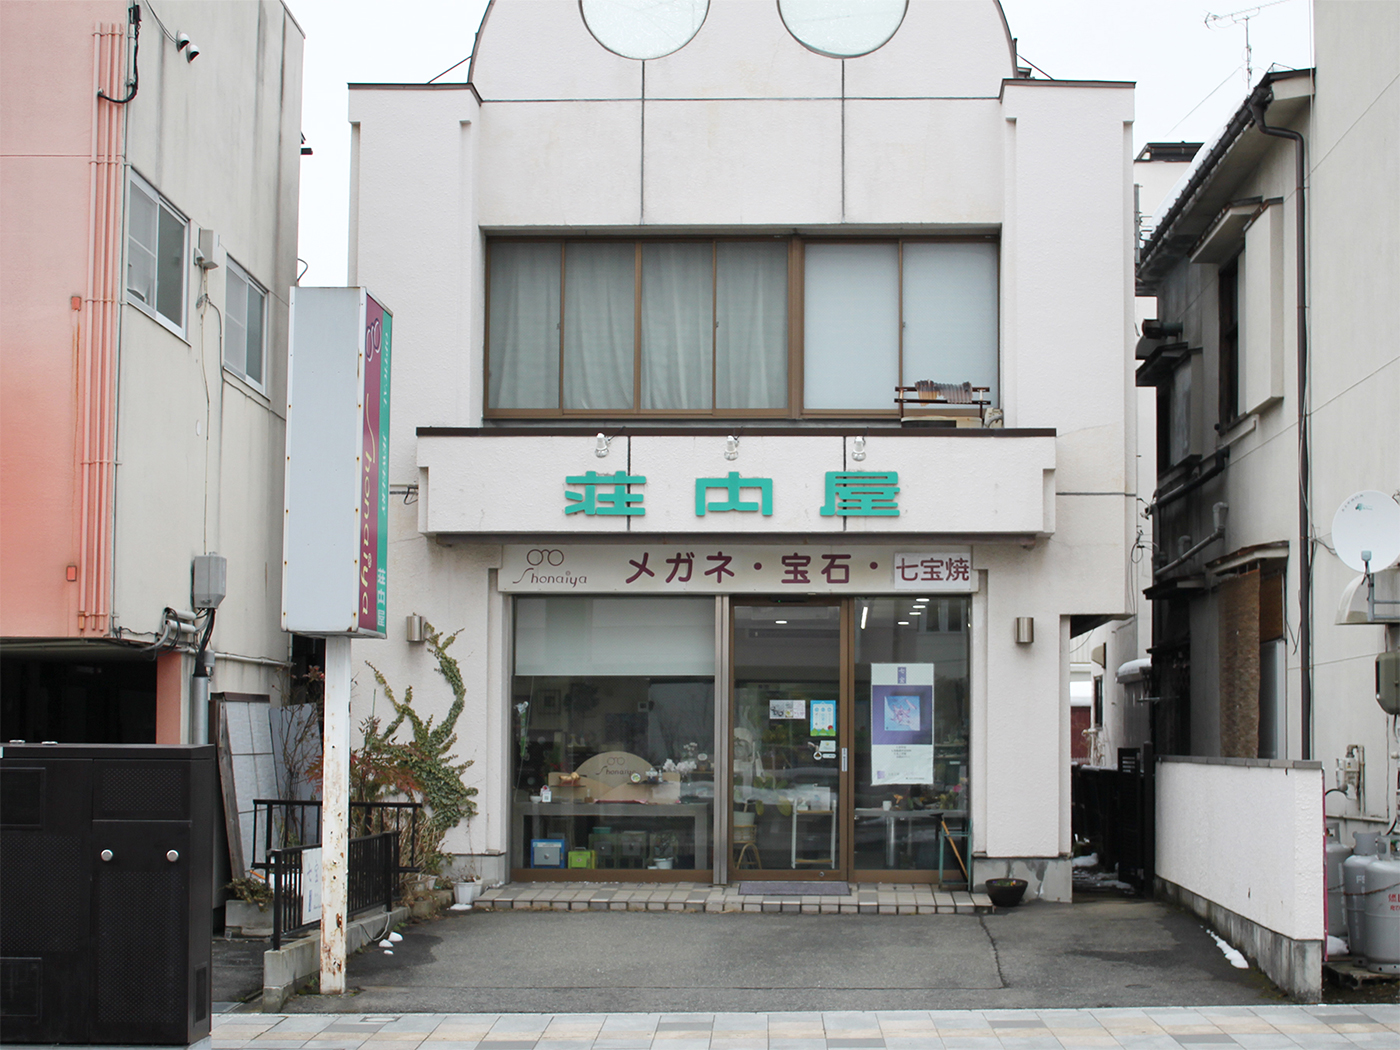
Originally this shop used to sell eyeglasses and jewelry, but there are also many cloisonne enamelware items made by hand by the instructor.
Not only accessories such as brooches and necklaces, but also tiles, plates, and Amabie items.
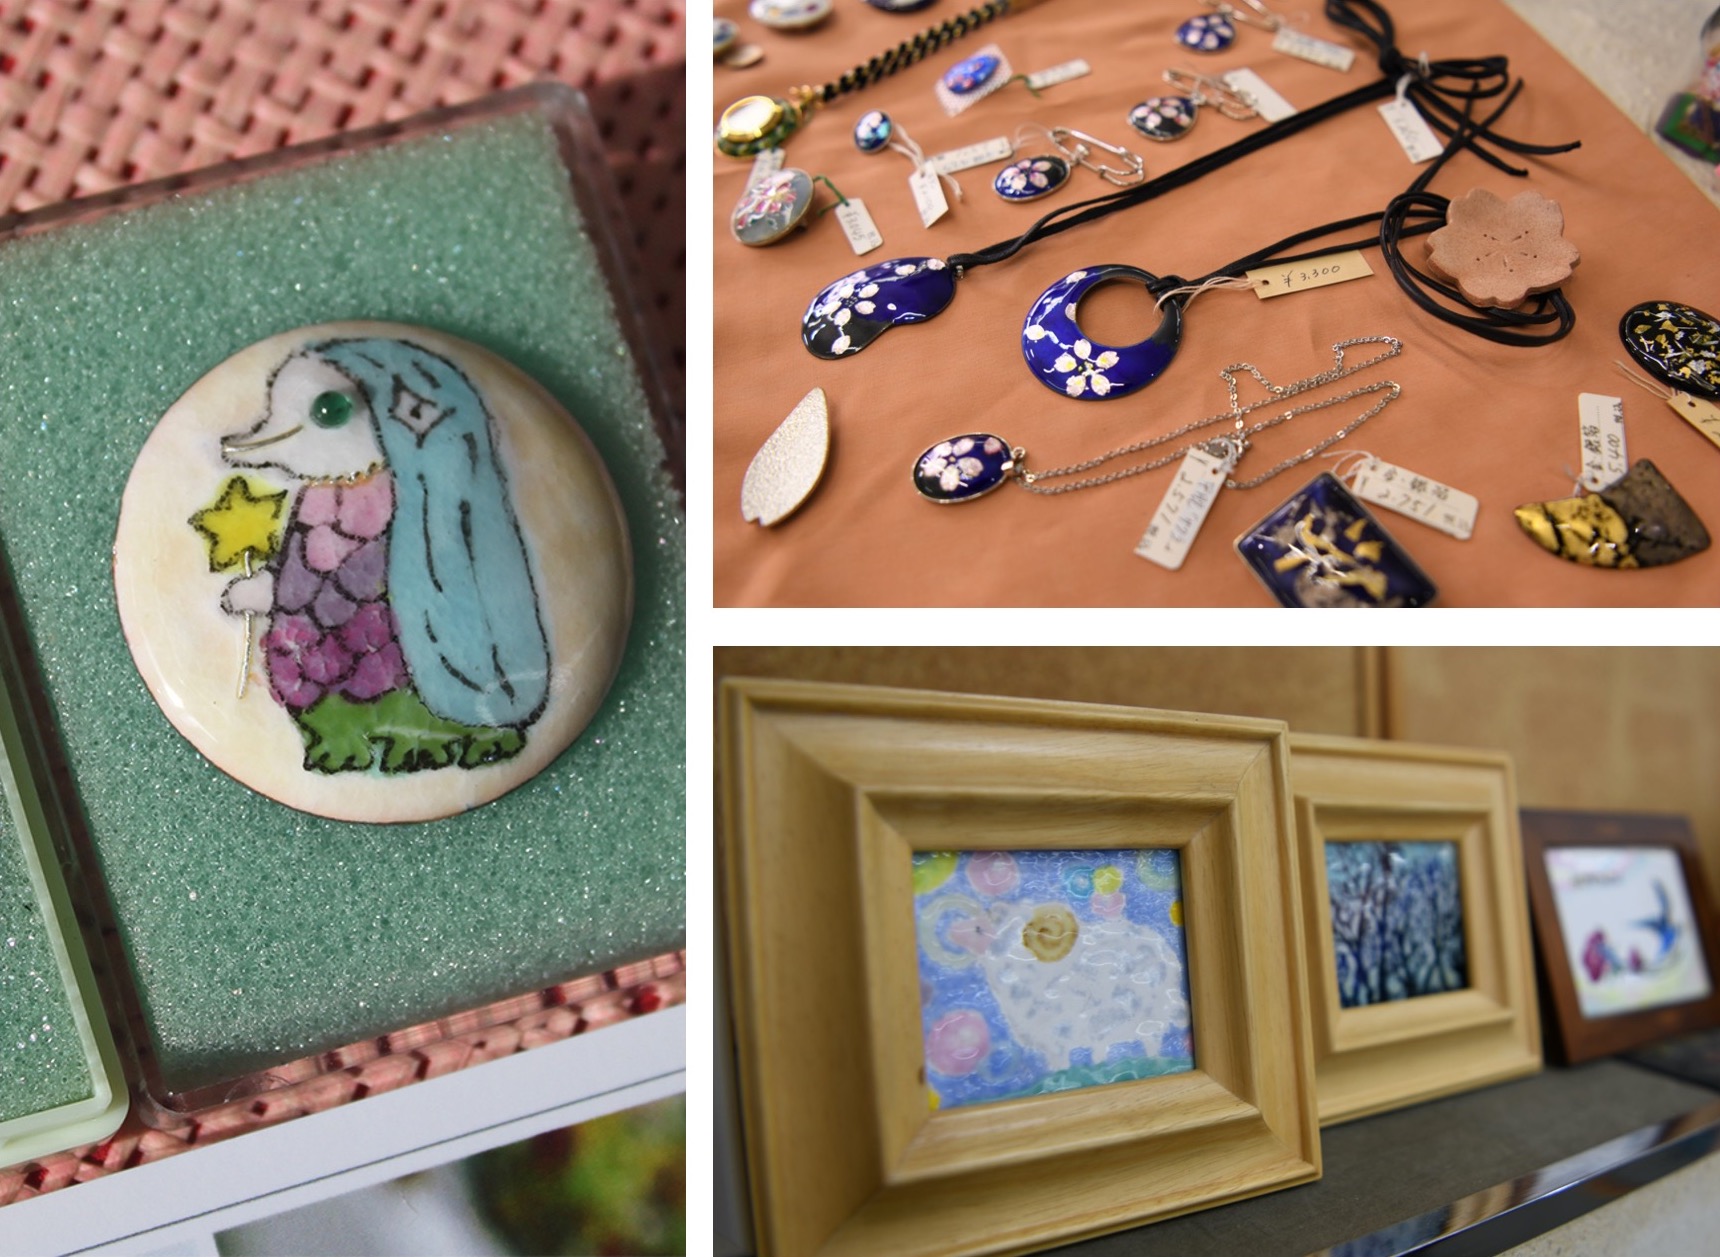
I am very excited to see the wonderful works ♪
By the way, the Shonai-ya Kobo Kujaku is a shop established in 1963.
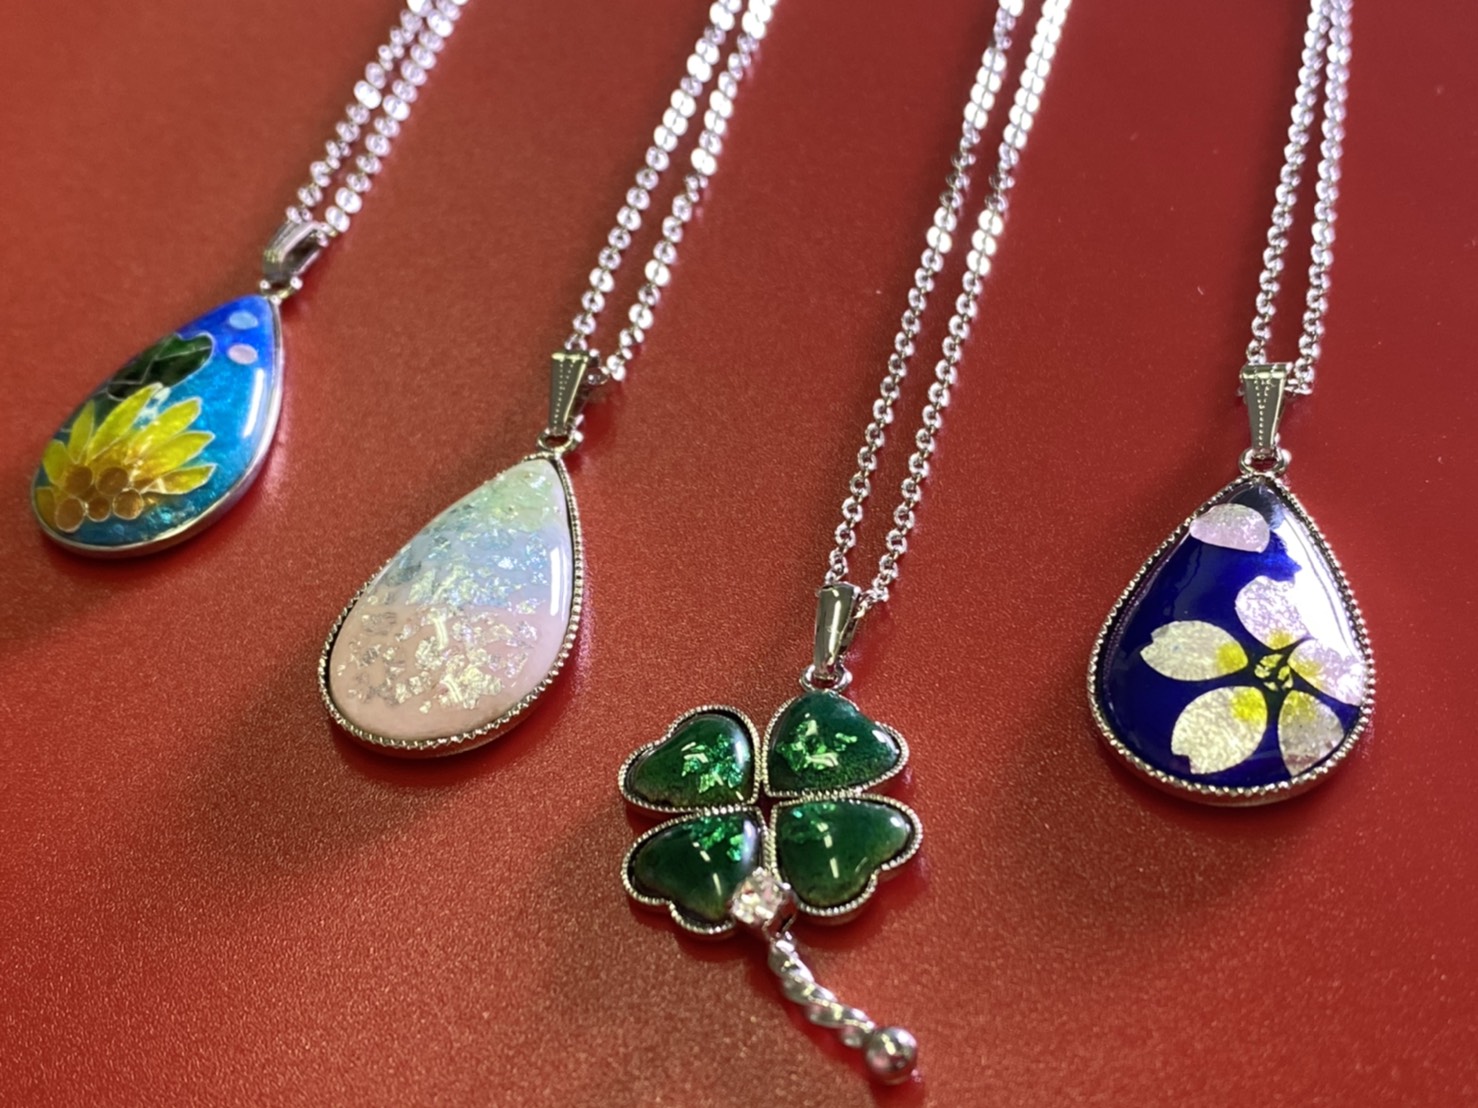
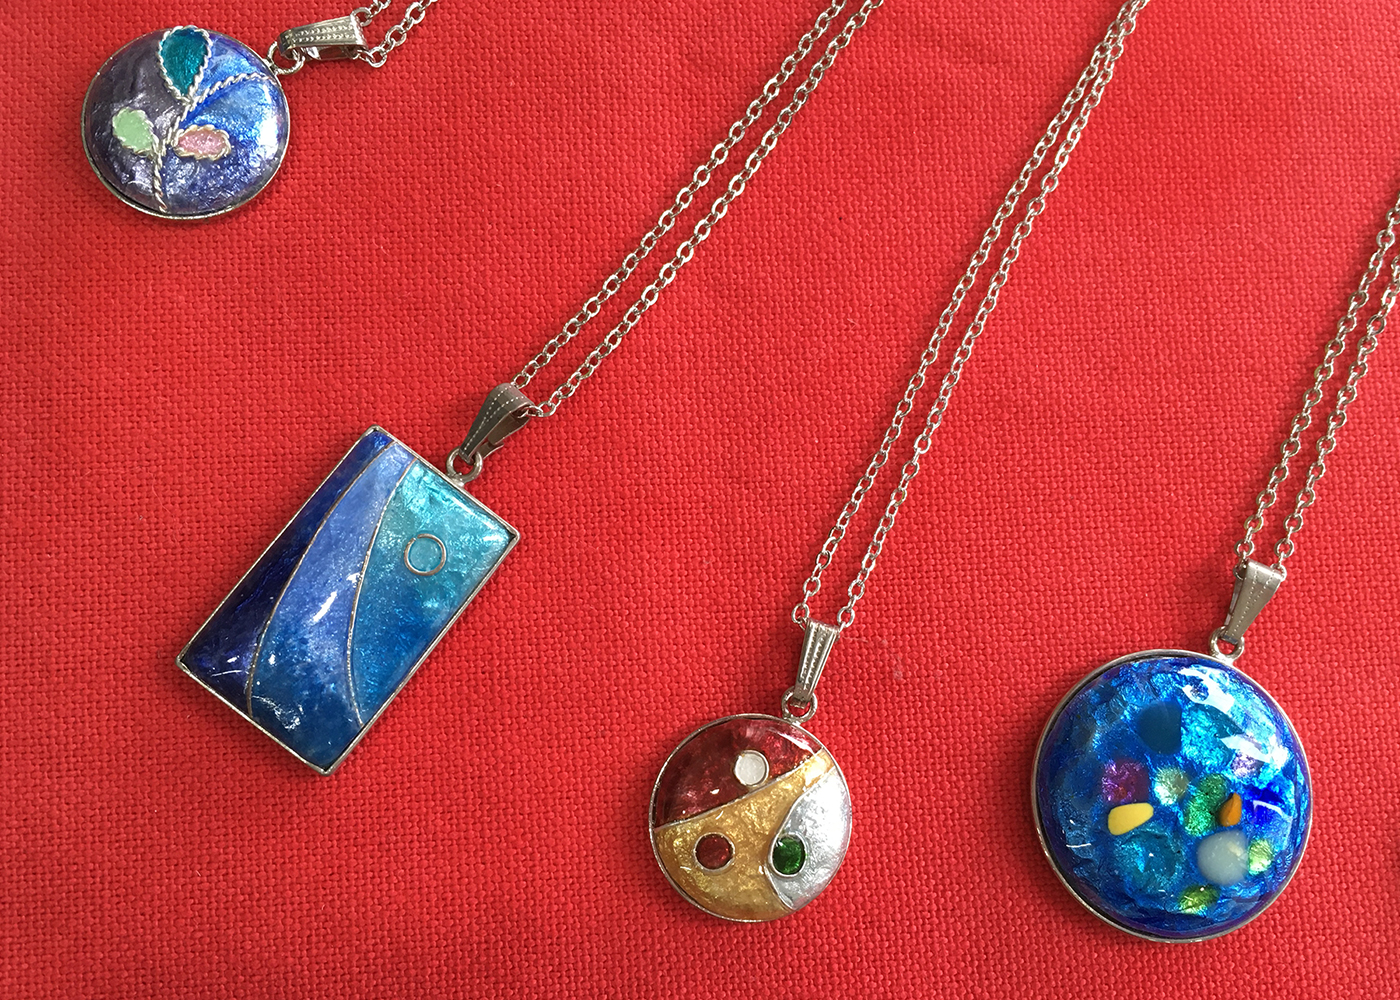
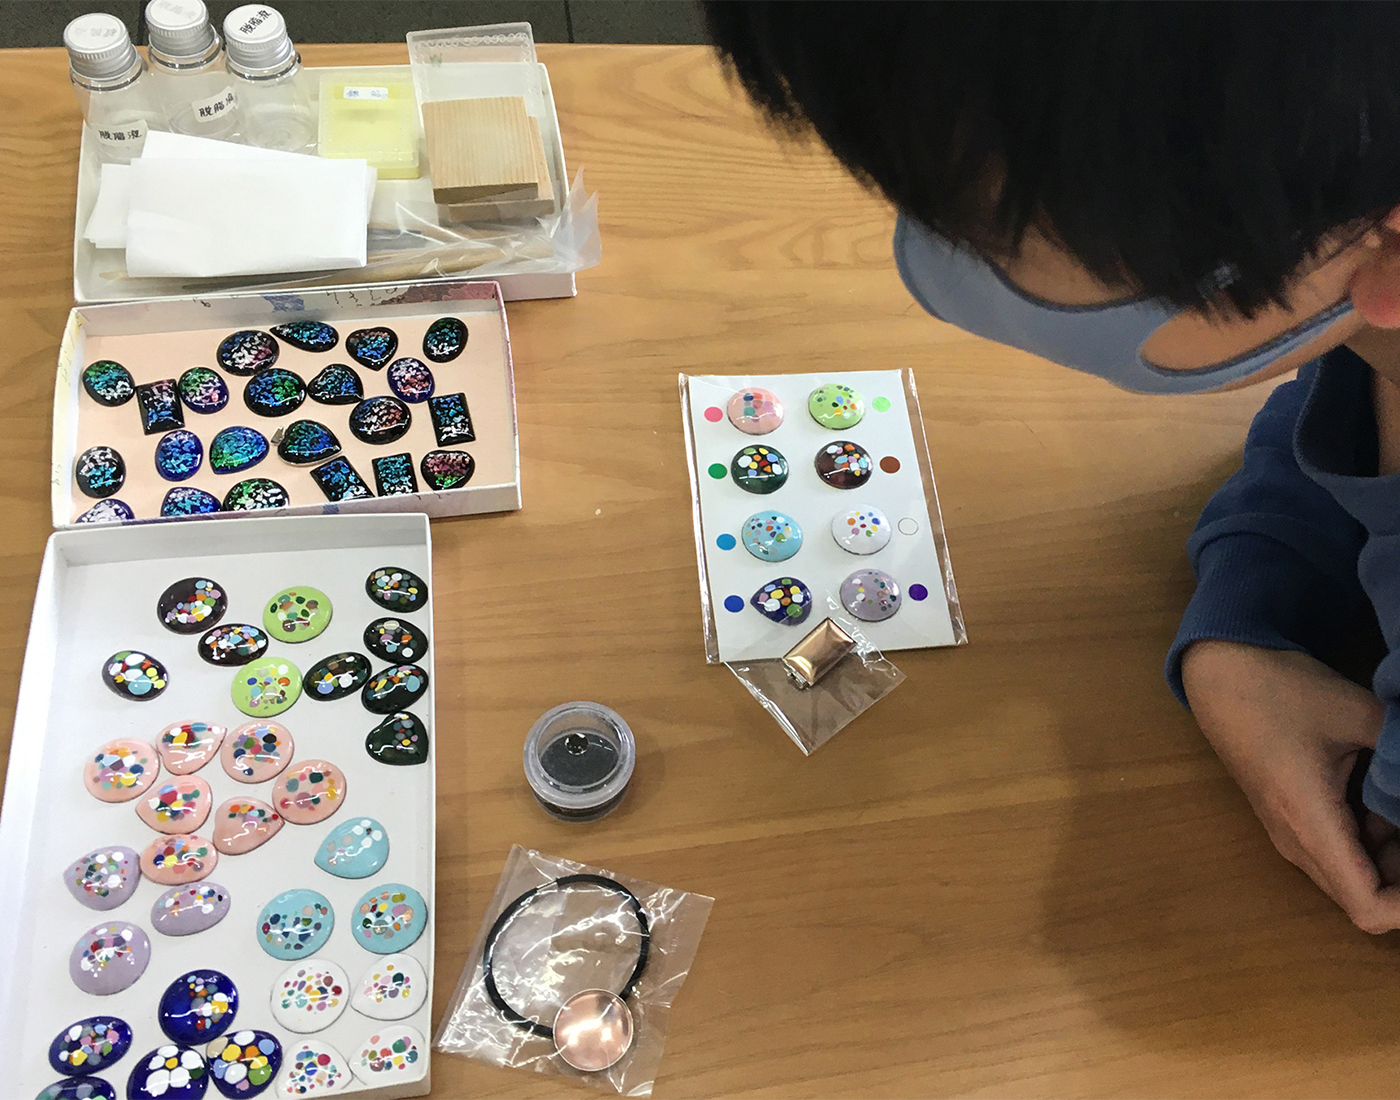
Sample of workshop-made art (frit method)
 Sample of workshop-made art (cut silver foil method)
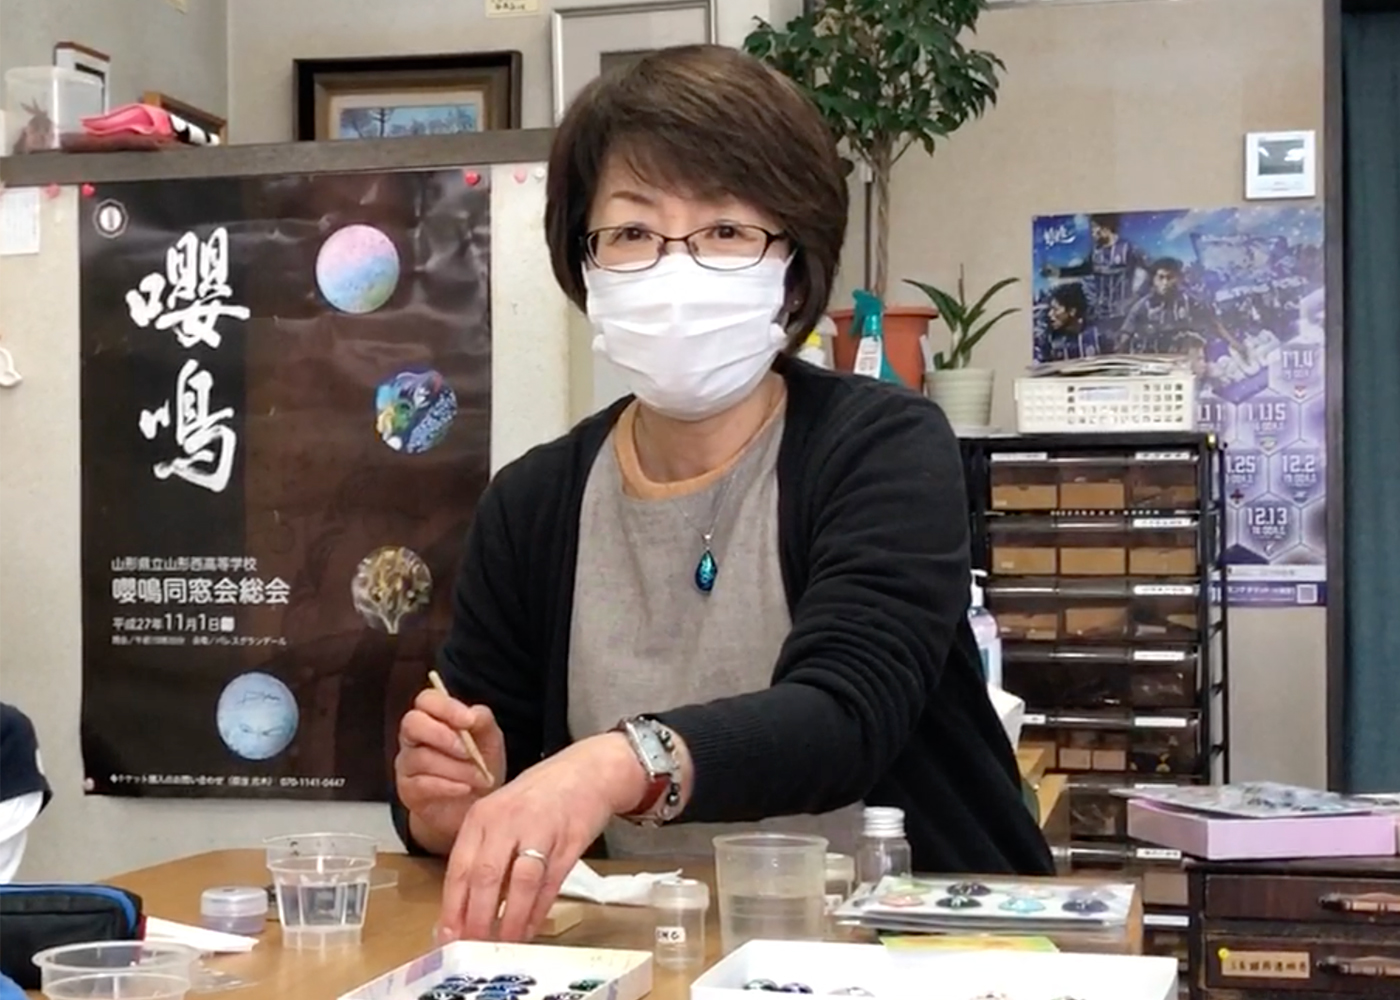
Here is the instructor Mitsuko Sato.
Next, I will report on the workshop experience.
Original colors and designs
Two courses
There are two courses that you can experience at Shonai-ya Kobo Kujaku: the “frit method” and the “cut silver foil method”.
In the “frit method” you first apply the base glaze, then place grains called frit and then fire the art.
In the “cut silver foil method” you first apply the base glaze, sprinkle the cut silver foil and fire it once. When done, you then apply transparent glaze on the silver foil before firing it again.
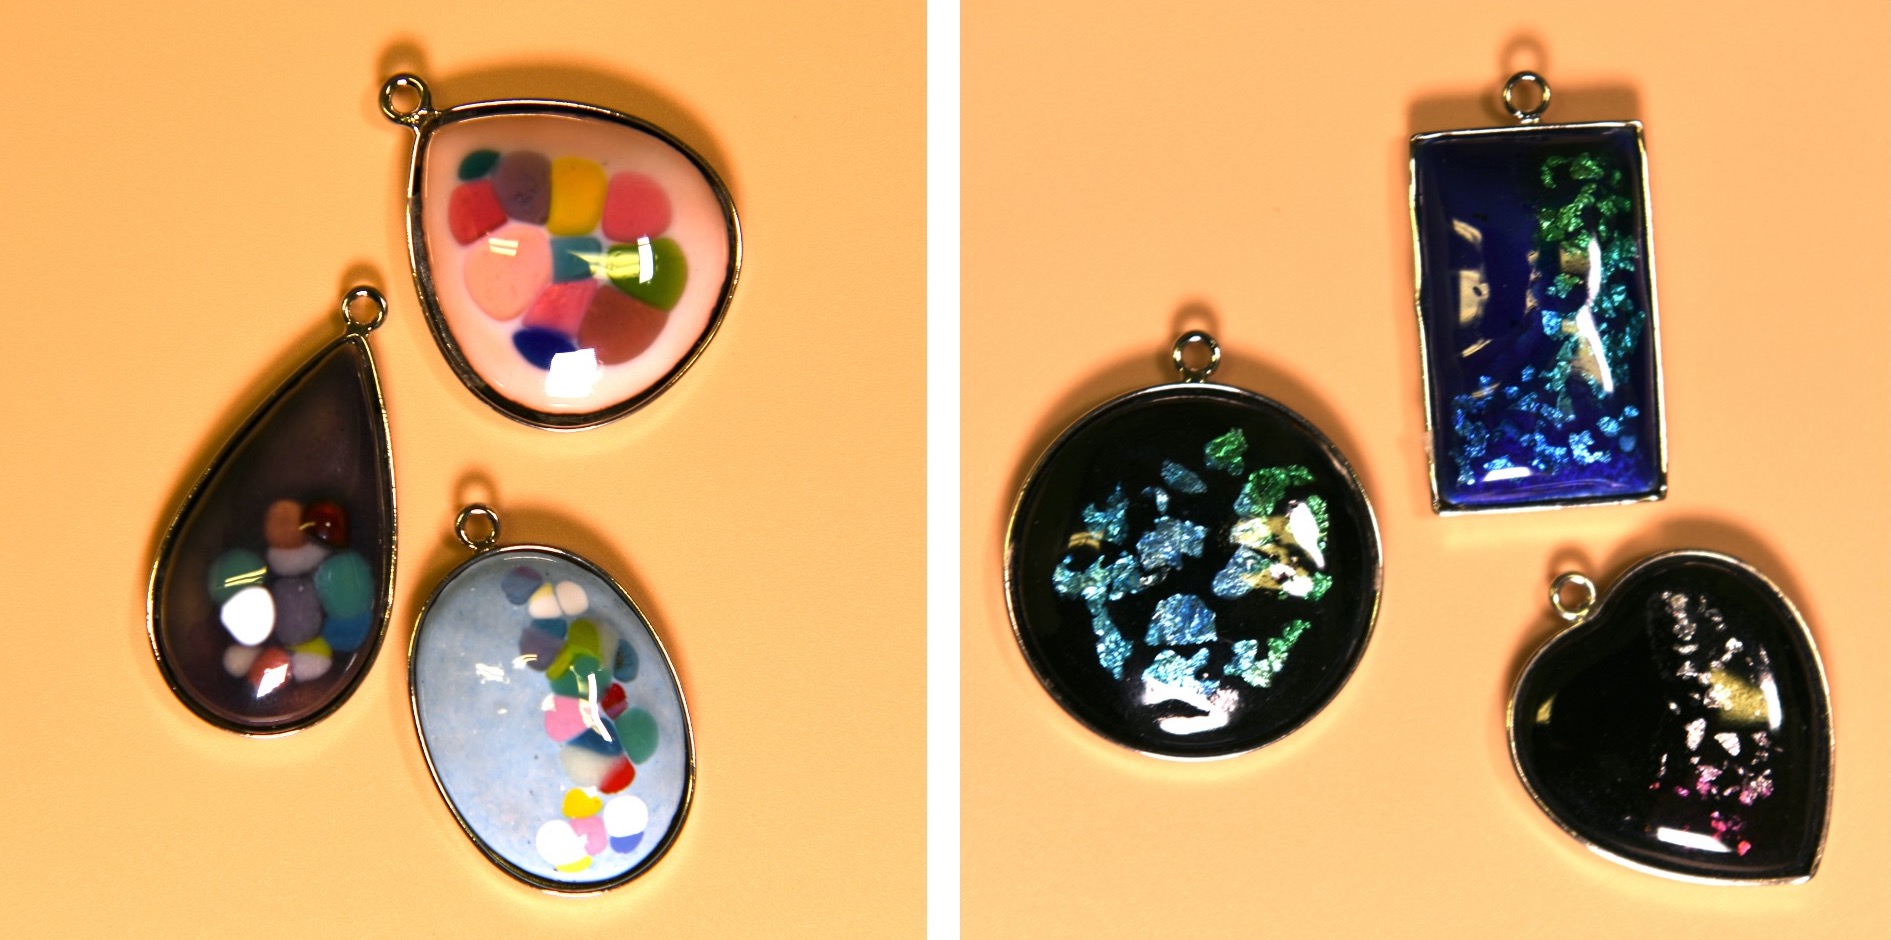
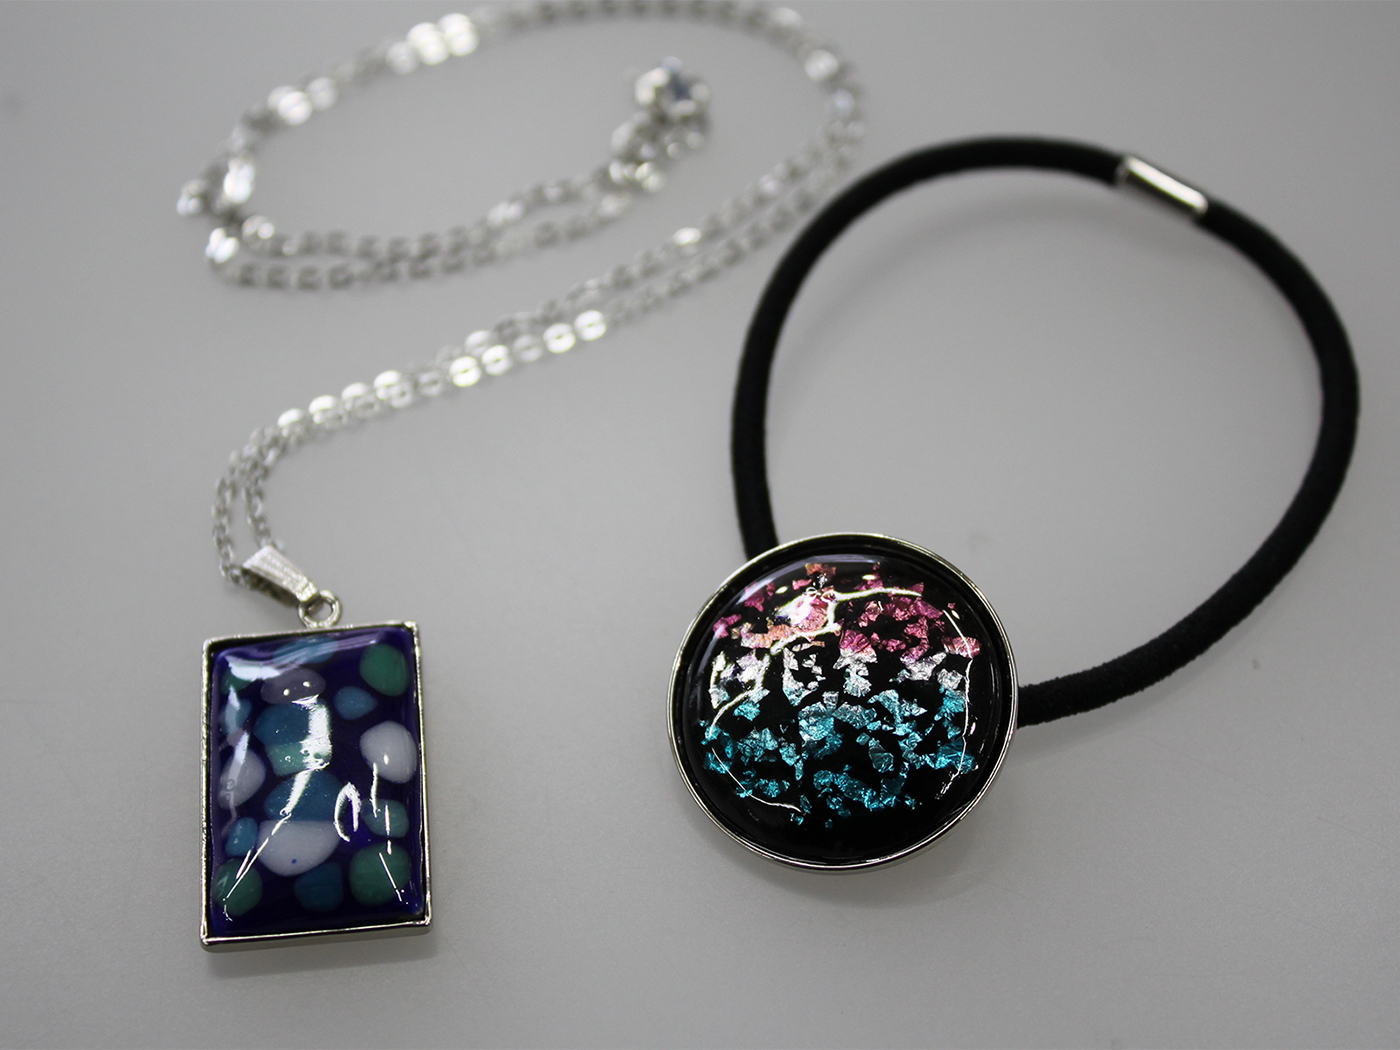
Left: Frit method / Right: Cut silver foil method
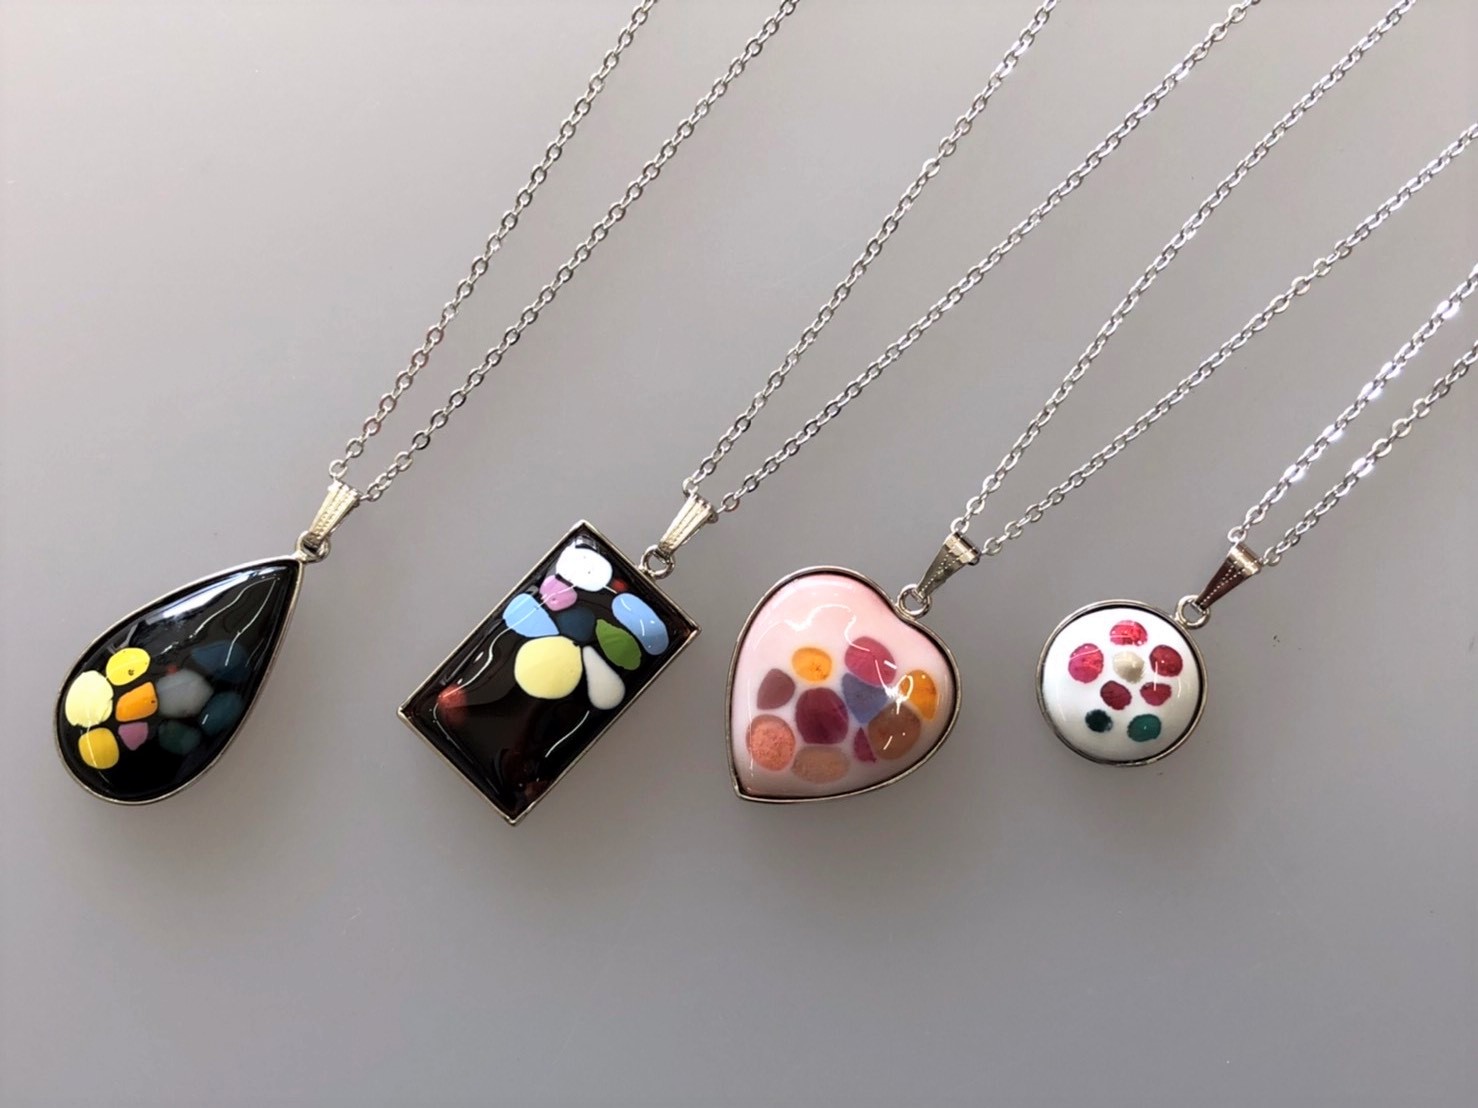
Six types
There are a total of six types of copper plates on which the glaze can be applied.
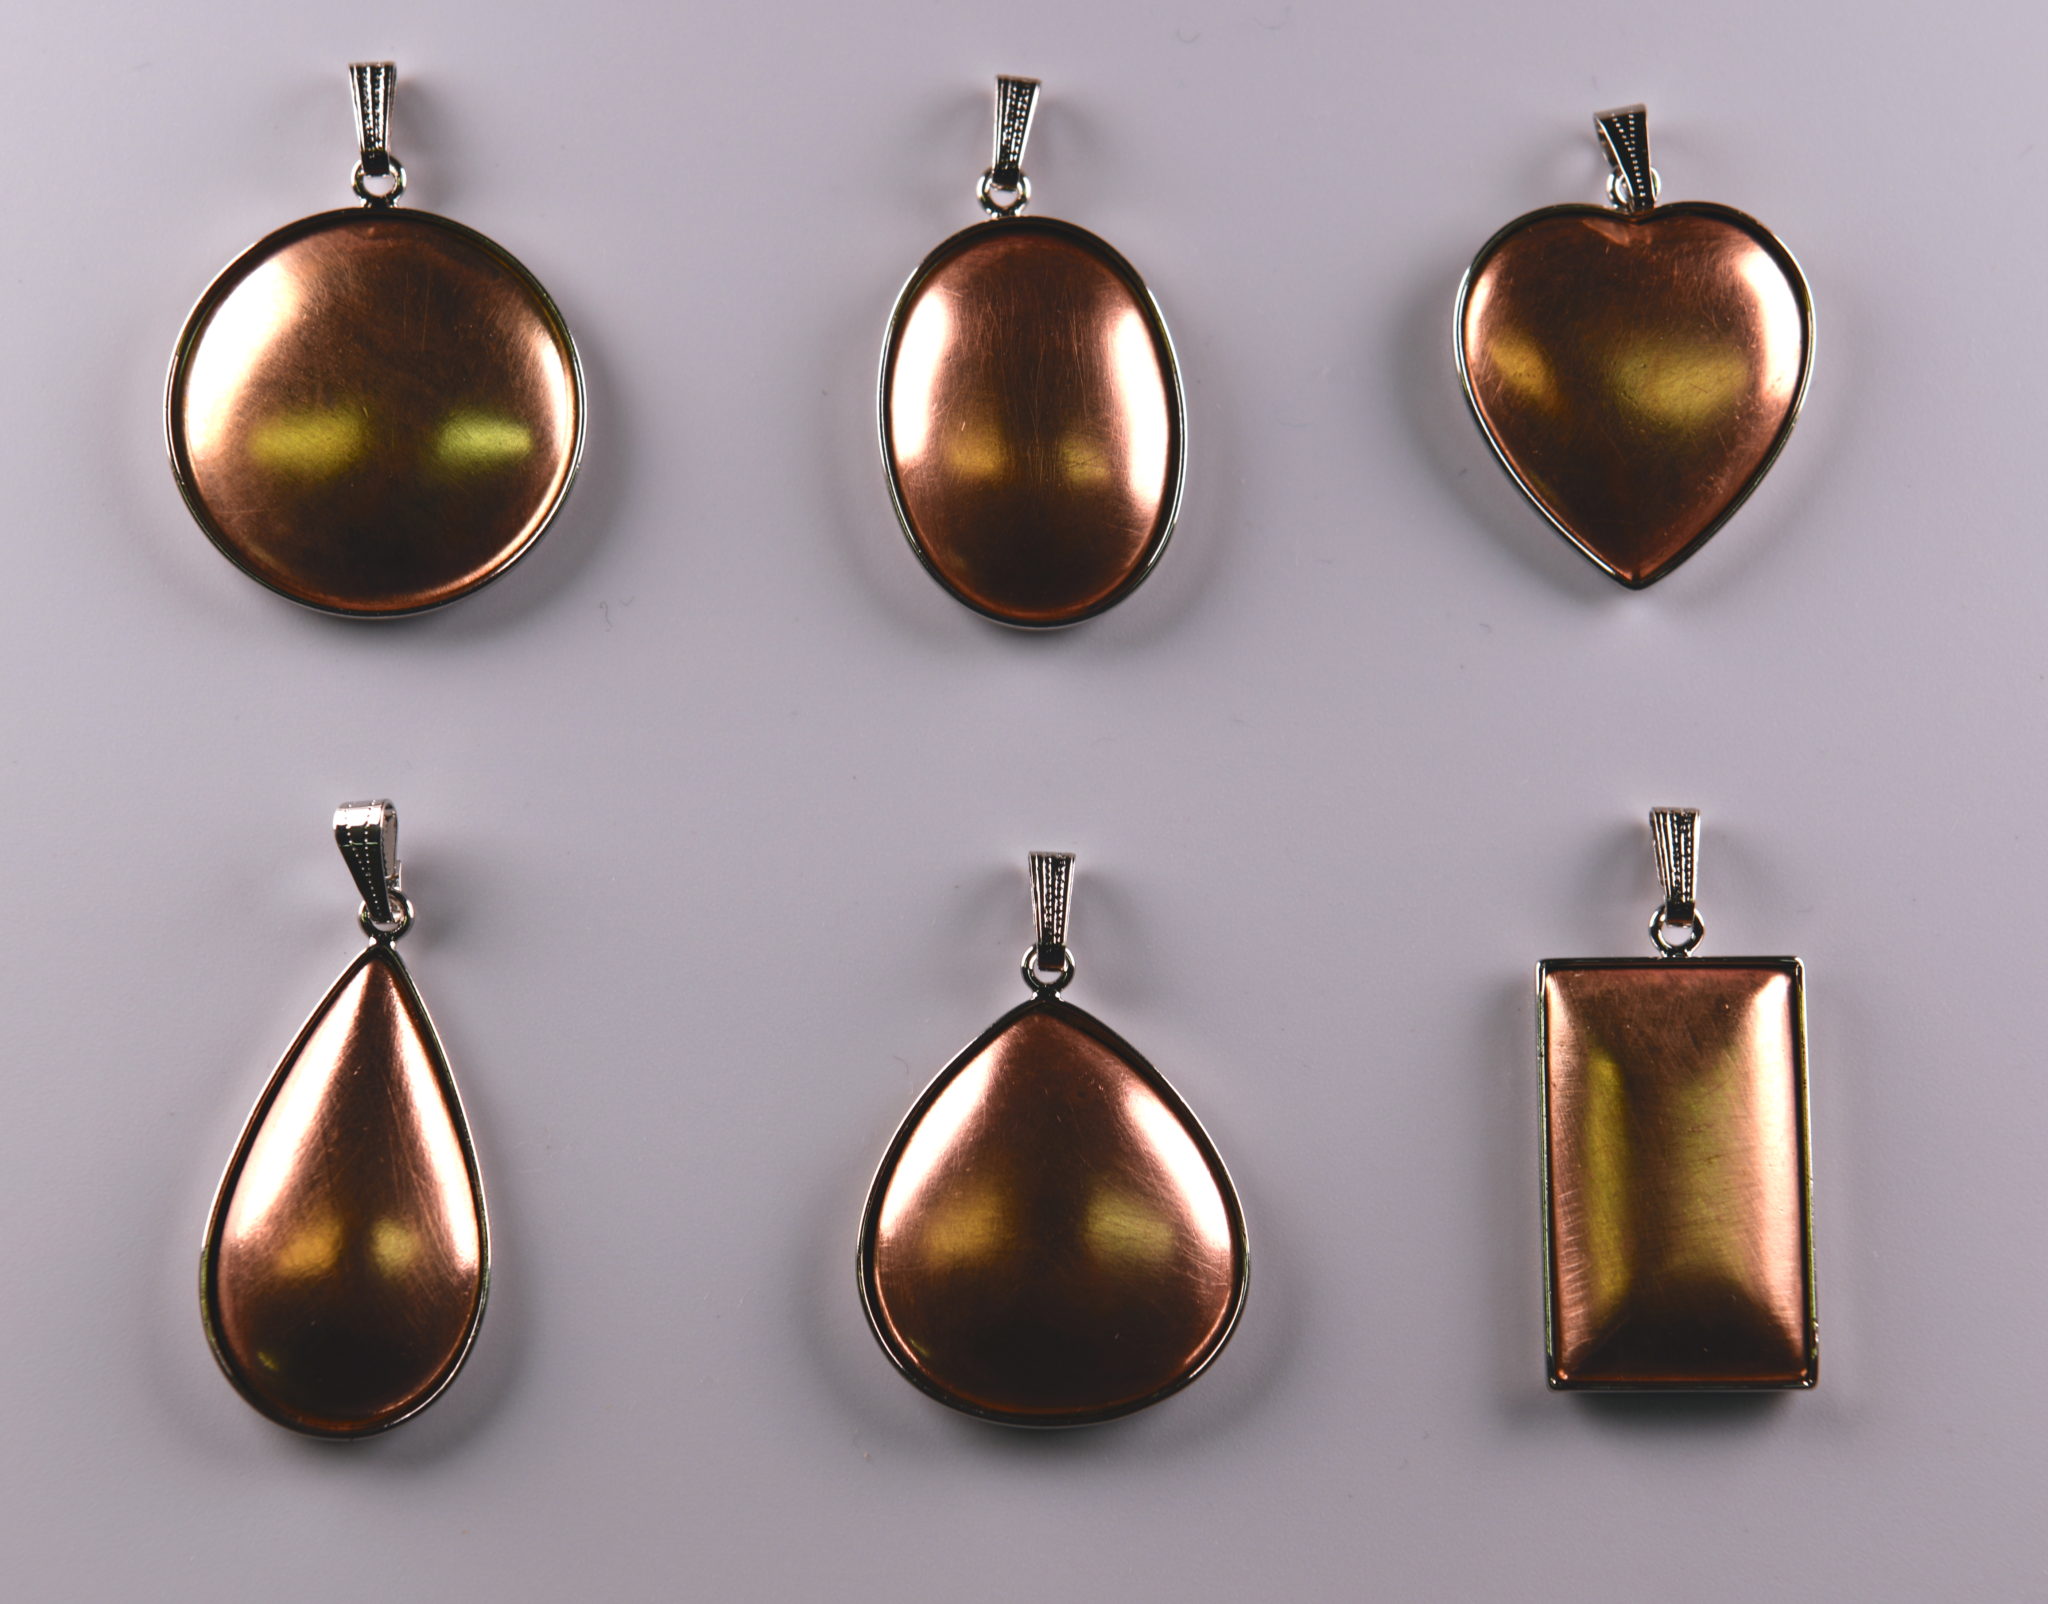 Upper row (from left to right): “Circle”, “Ellipse”, “Heart”
Lower row (from left to right): “Drop”, “Natsume”, “Long angle”
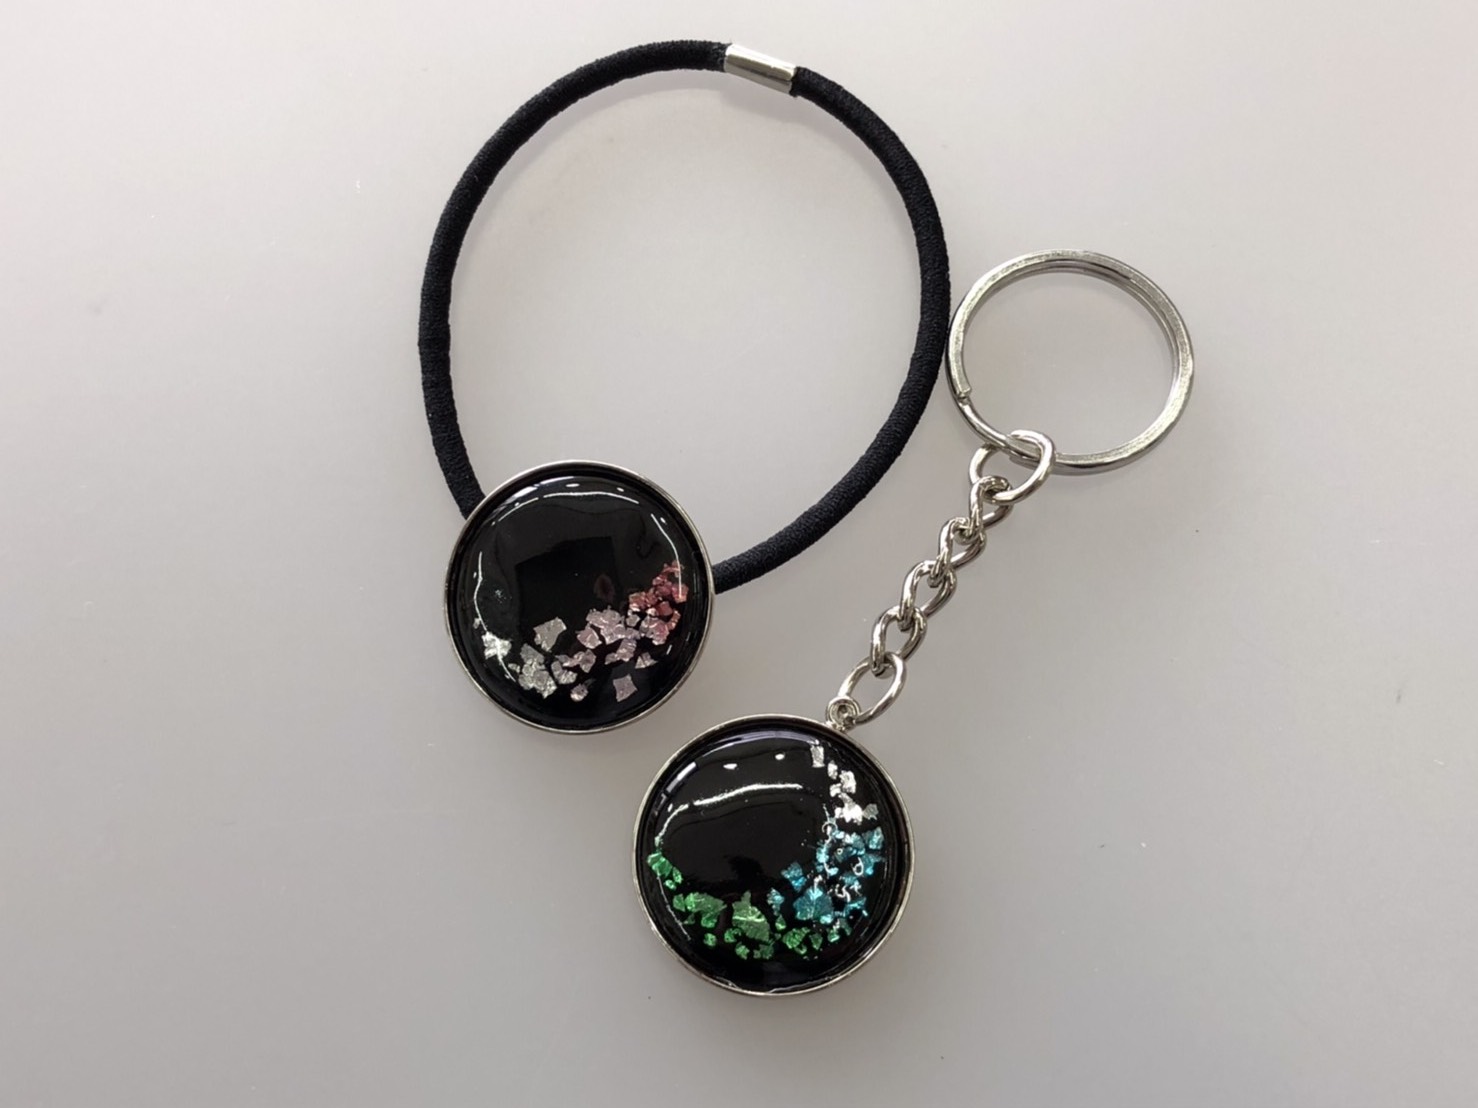
At the time of experience, you can choose your favorite type and make it into a pendant, key chain, strap or hair band.
* Please note that some items may be out of stock.
* The hair band can only be made out of the circle type.
Glaze
Glazed is the base design for accessories.
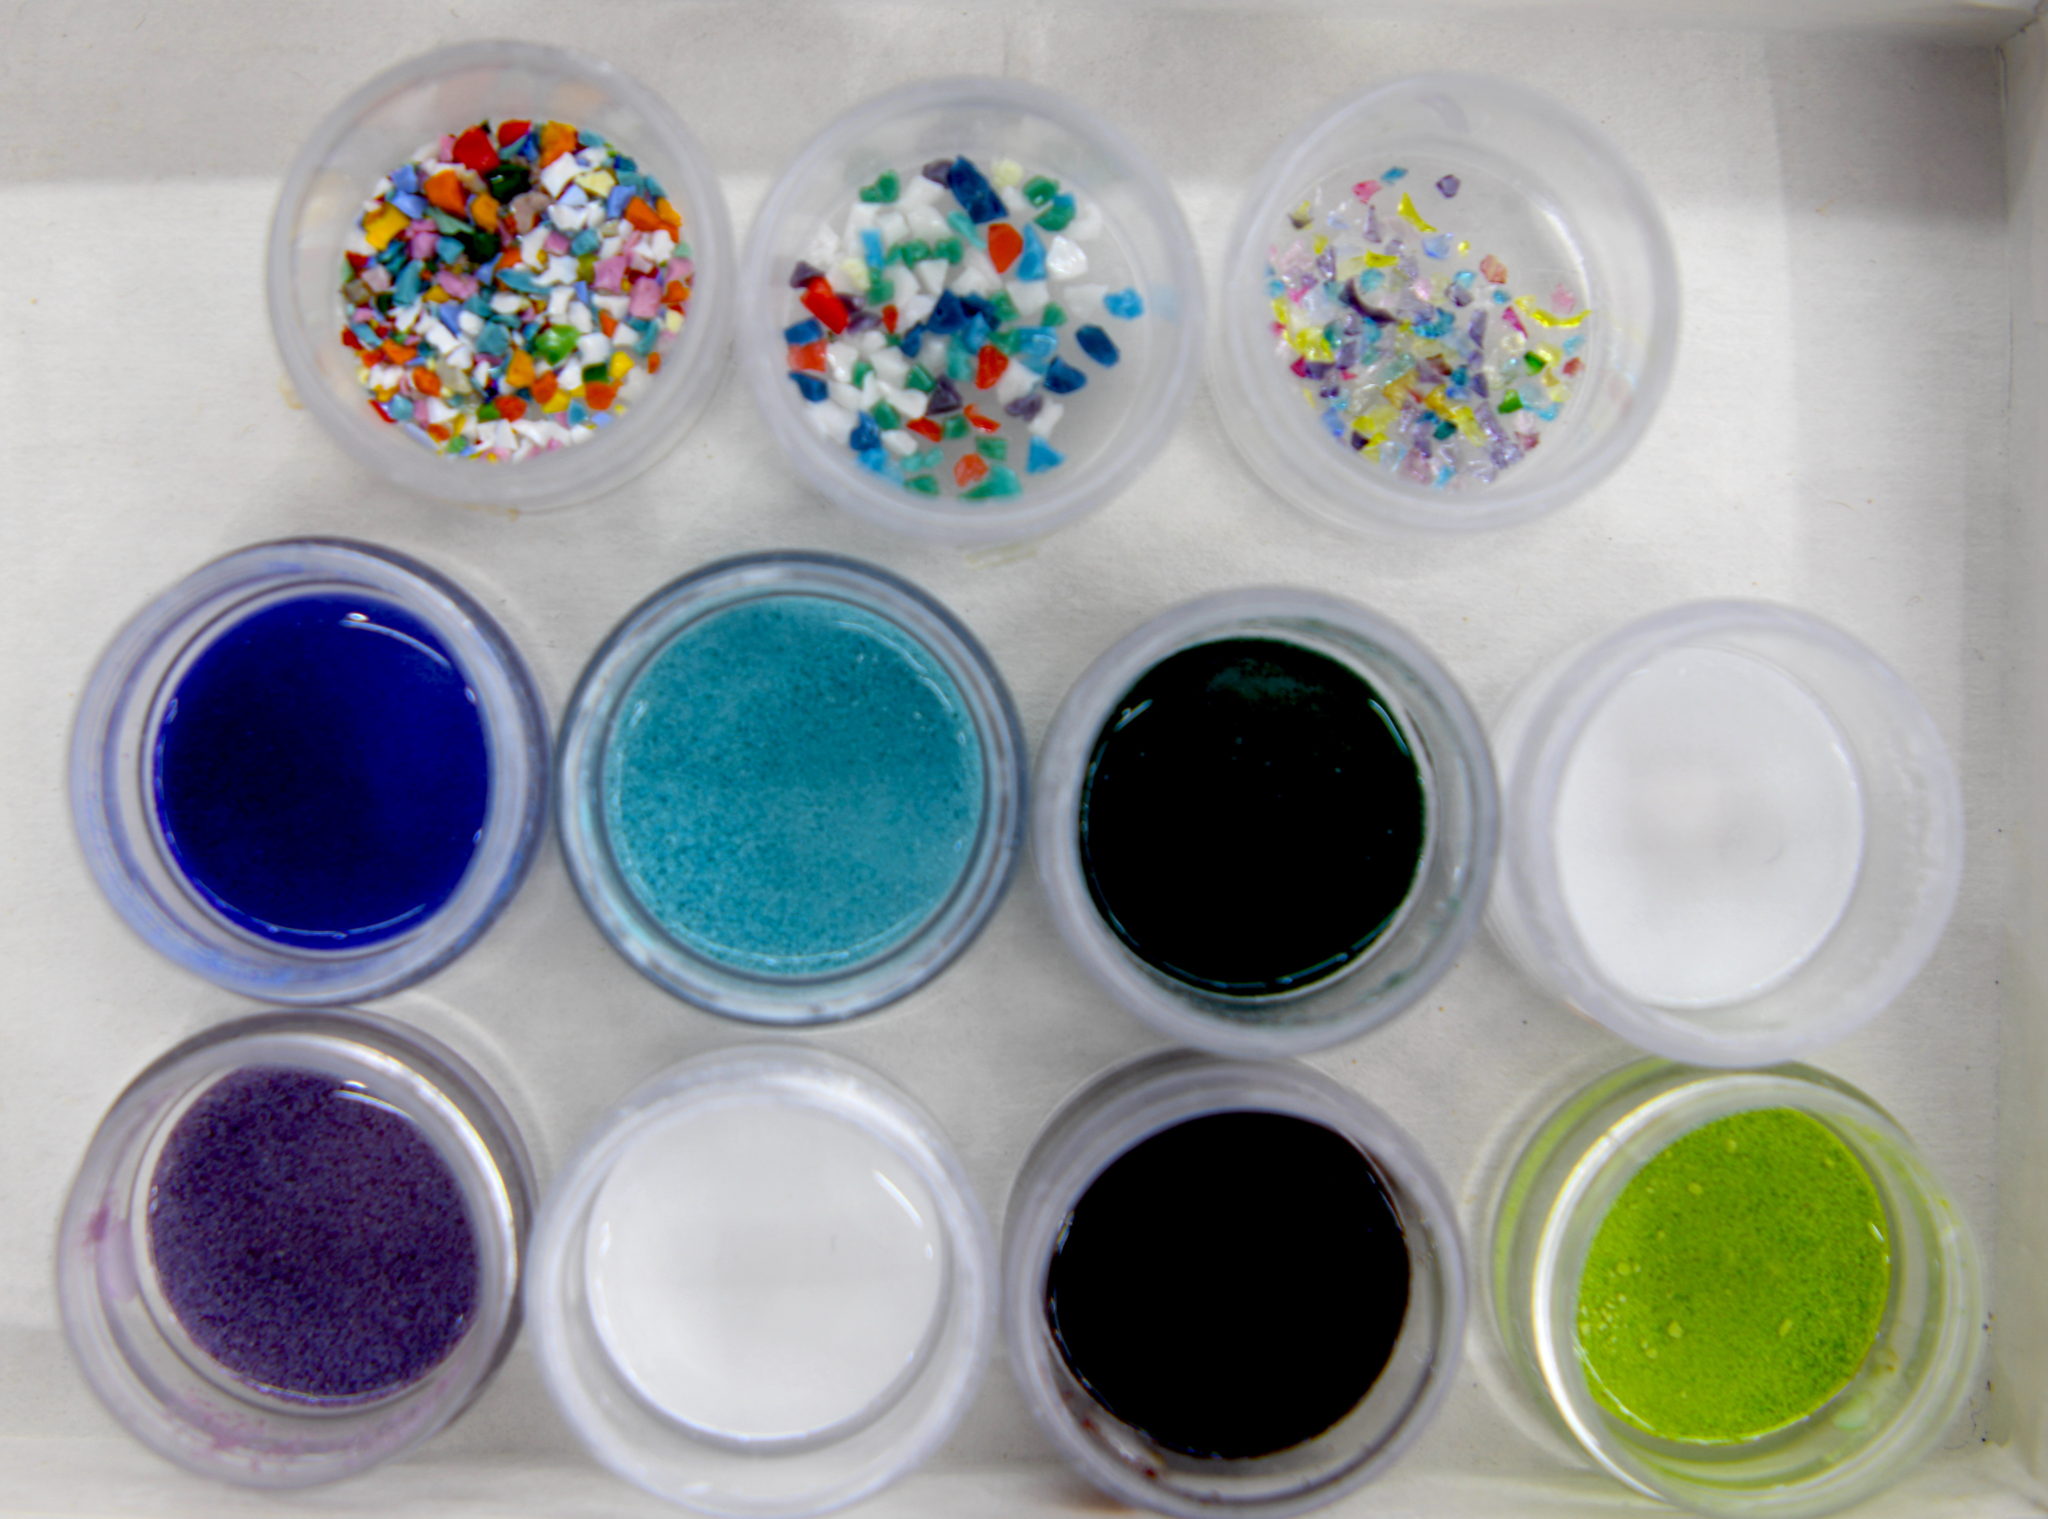
Materials used in the frit method (1st stage: frit / 2nd stage: glaze for base)
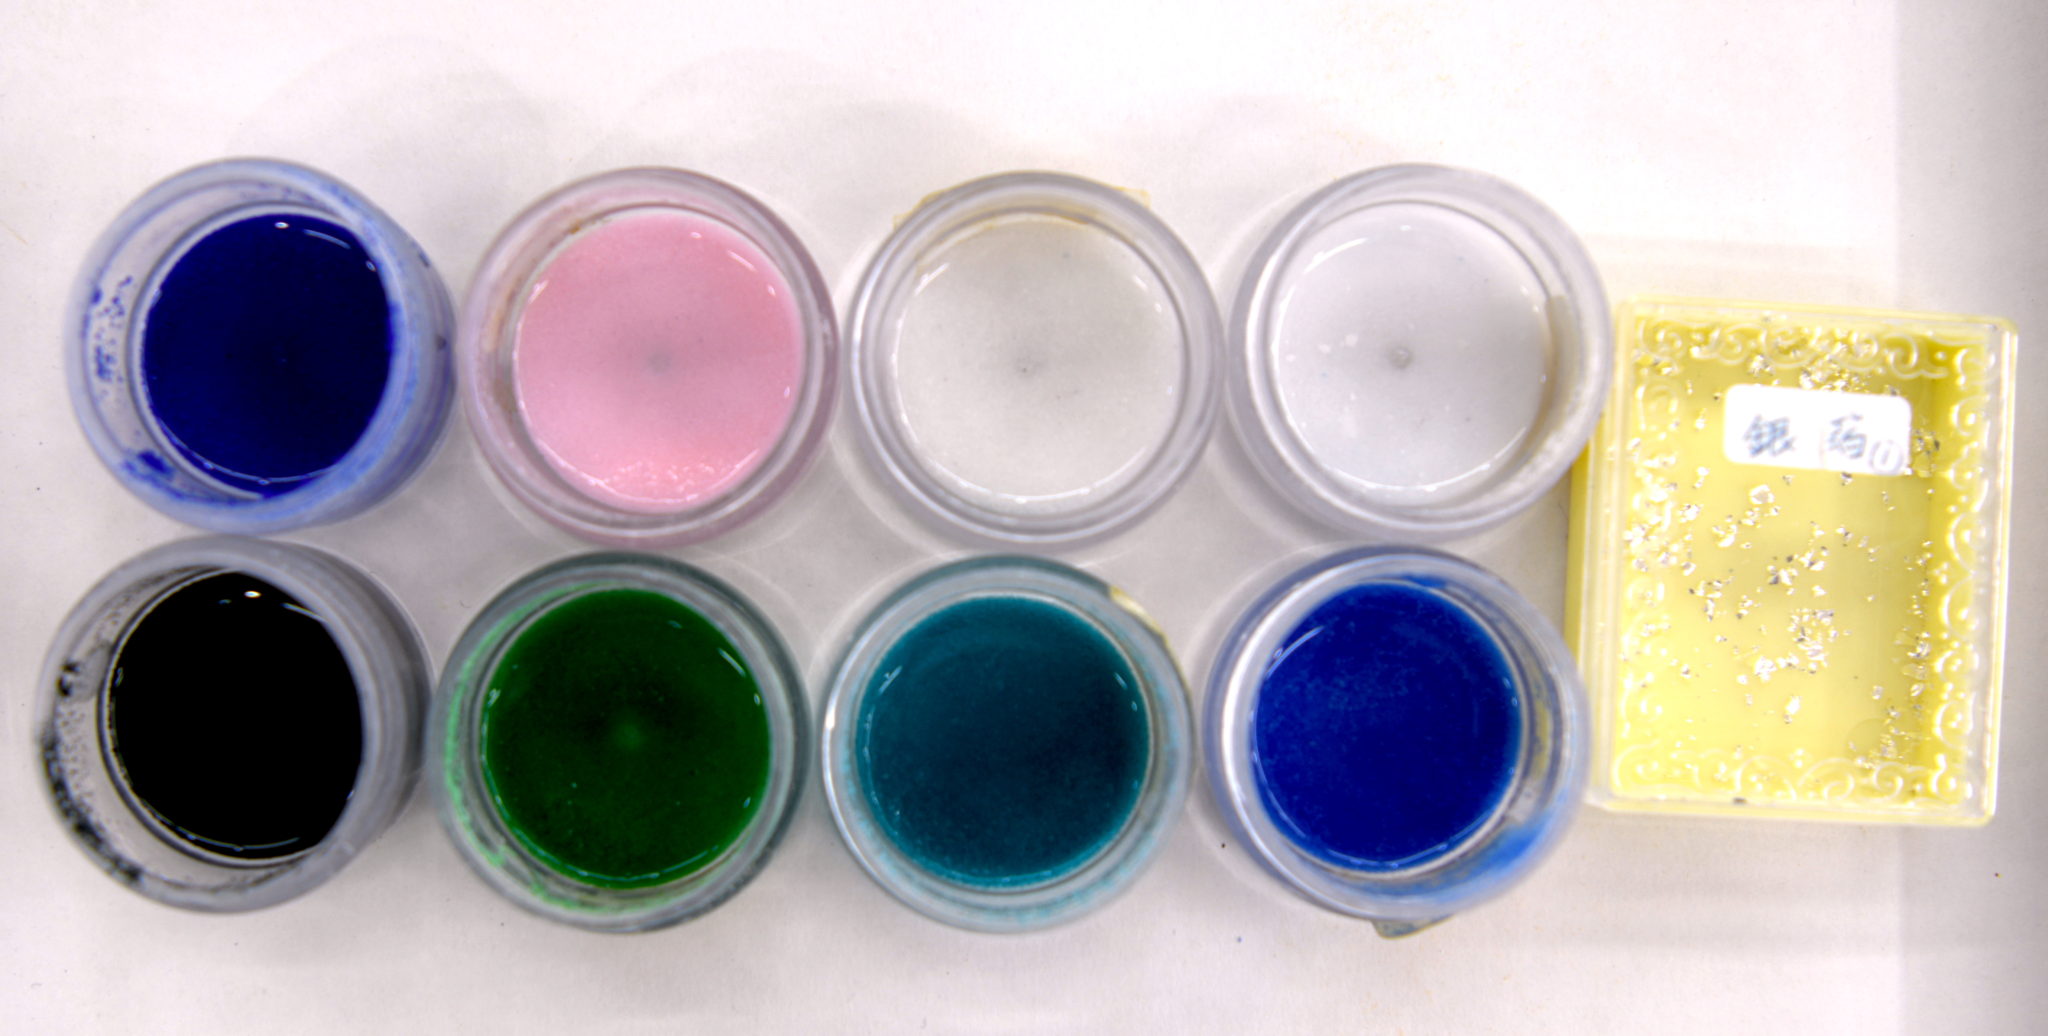
Material used in the cut silver foil method (Left end: Glaze for base (navy blue / black) / Middle: Glaze for topcoat / Right end: Silver foil)
You can choose your favorite combination from eight types of glazes for the frit method, and one of two types of base glazes for the cut silver foil method followed by one of six types of finishing glazes.
Electric furnace
Cloisonne ware is, as the name suggests, a type of pottery.
After applying glaze to the copper plate, it is fired in a furnace (kiln) at 800 to 900 ° C.
This electric furnace plays an active role in that case.
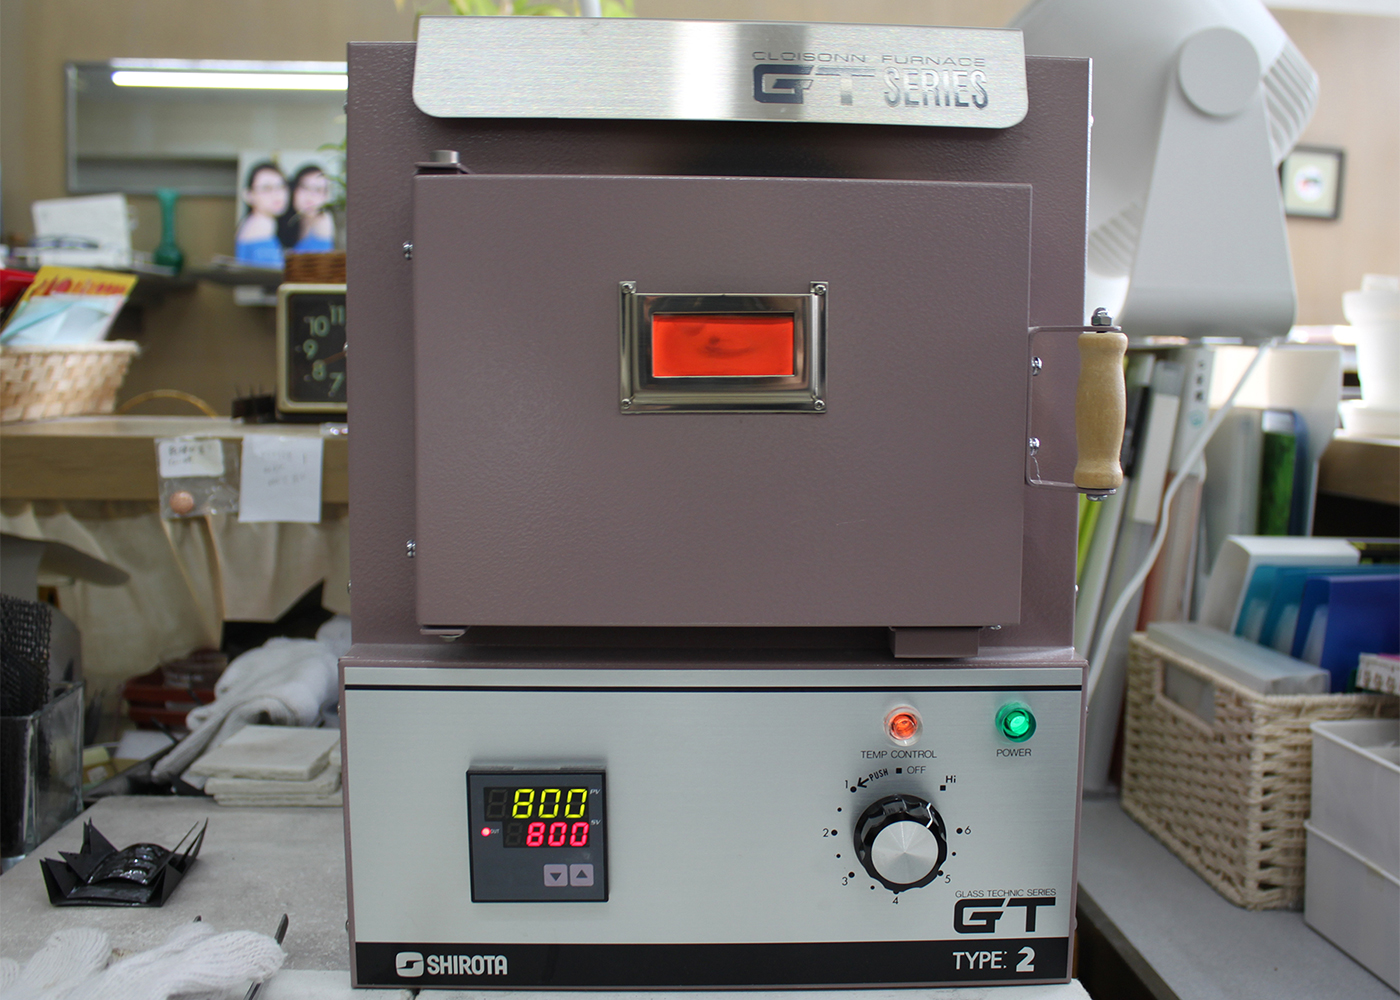
At the cloisonne ware experience at Shonai-ya Kobo Kujaku, you can even put it in a fire and bake it yourself, and you can take your work home with you on the same day.
Experience start
① Type selection
This time, my son decided to experience the “frit method” and I decided to experience the “cut silver foil method”.
The teacher will show me a lot of samples of the work, so I will choose the glaze and type based on that, but all of them are wonderful and I am at a loss.
After worrying, my son chose a “rectangular” copper plate and I chose a “round” copper plate from among the six types.
Tools are lined up in front of me, and I’m about to start working.
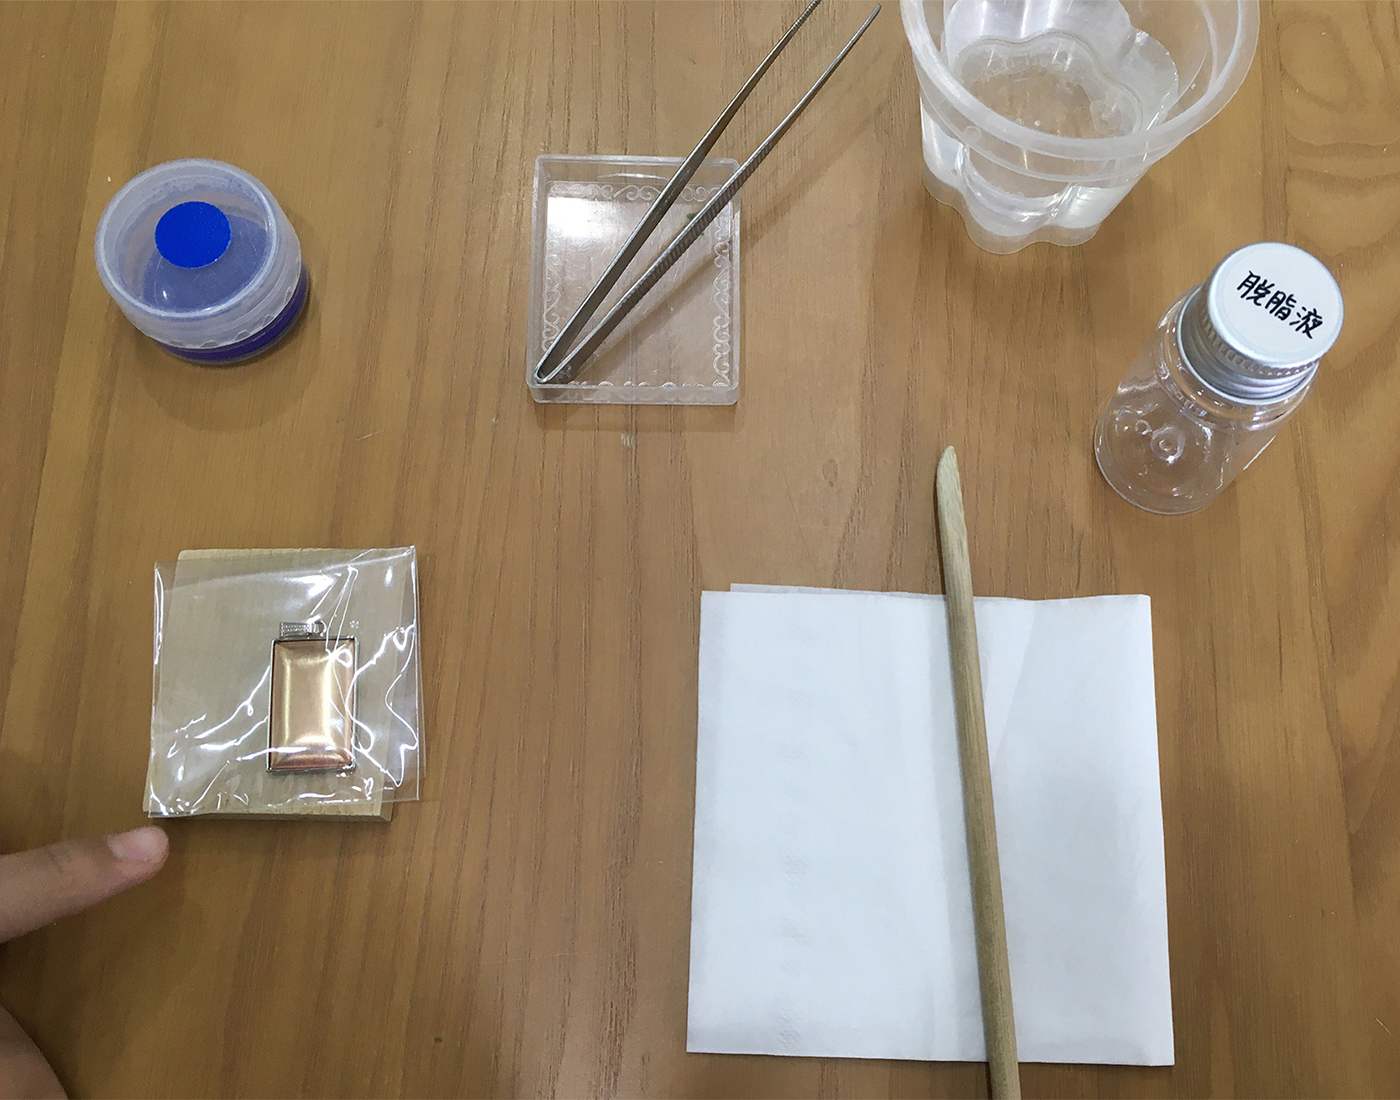
I’m nervous about the first time …
However, thanks to the cheerful and cheerful teacher’s speech, I am fully motivated.
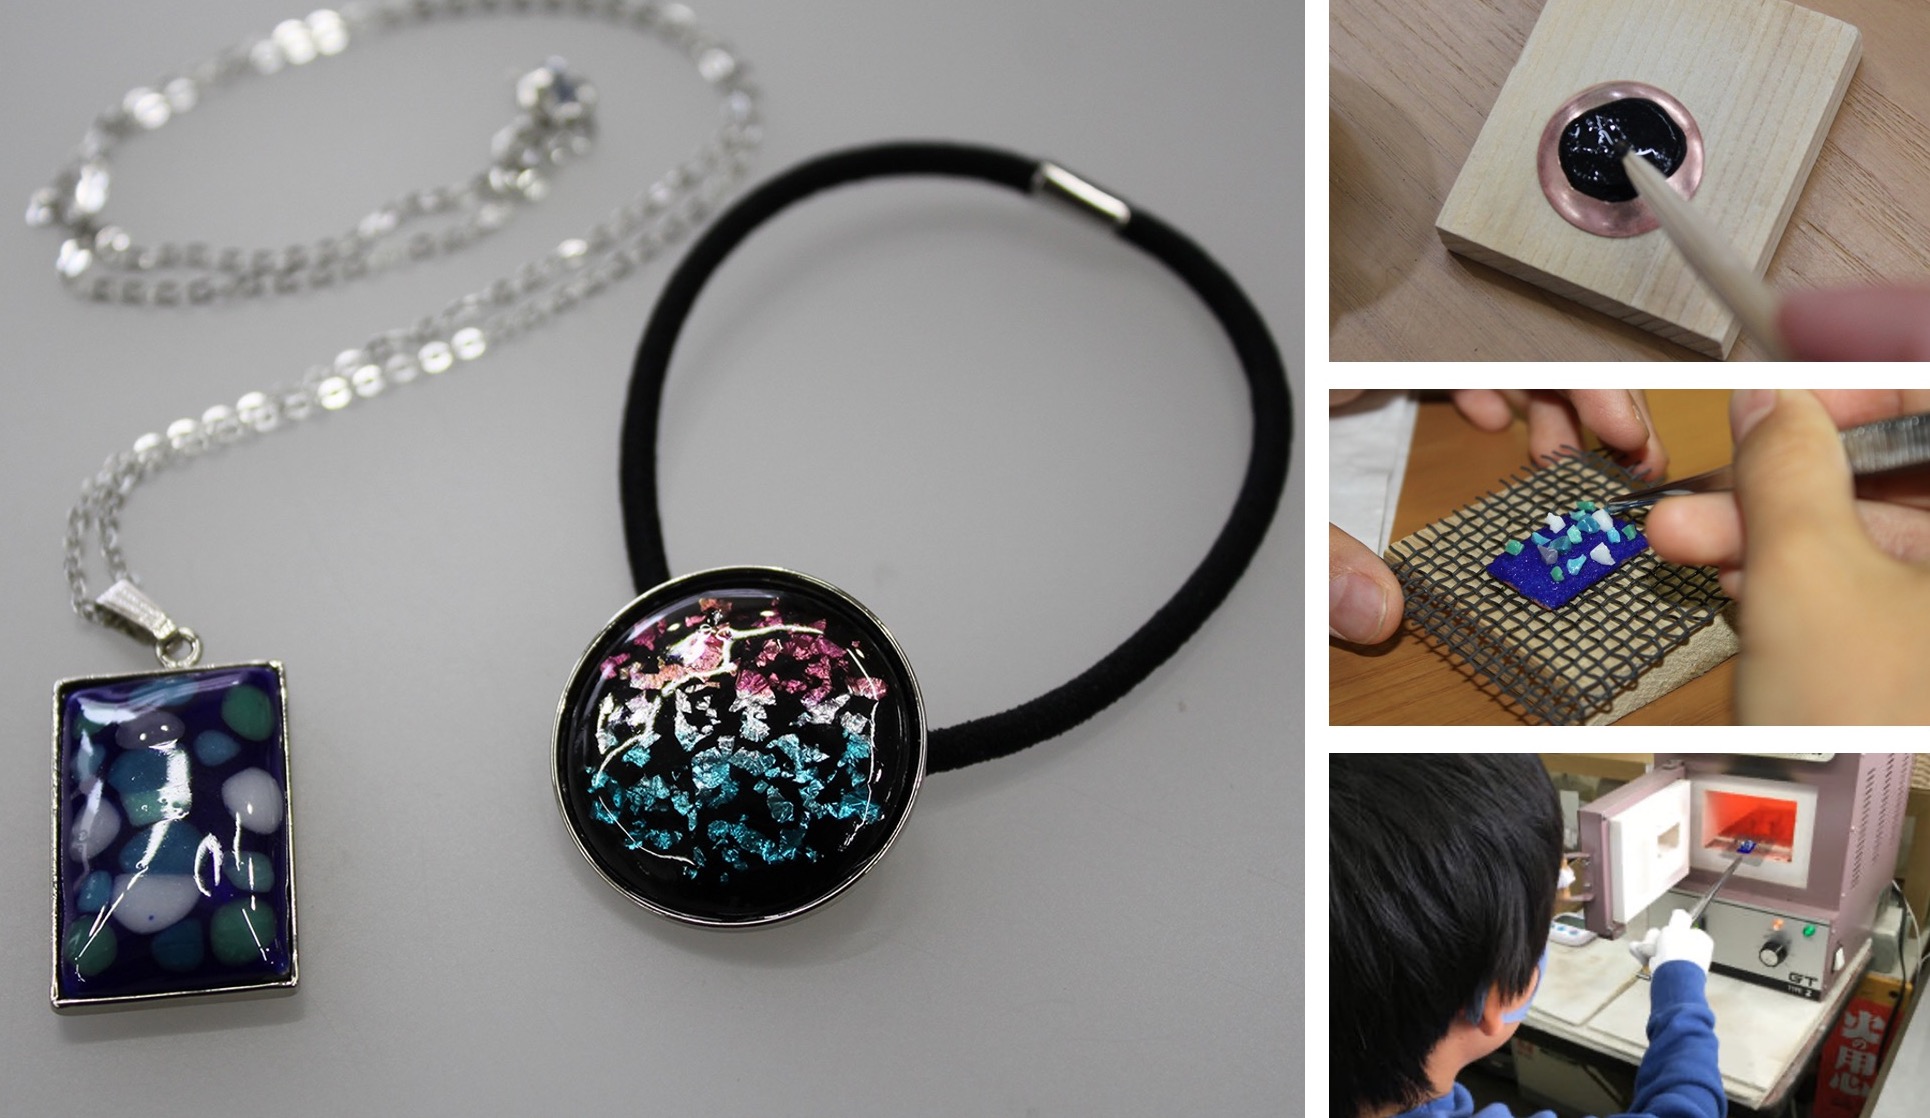
② Making a base
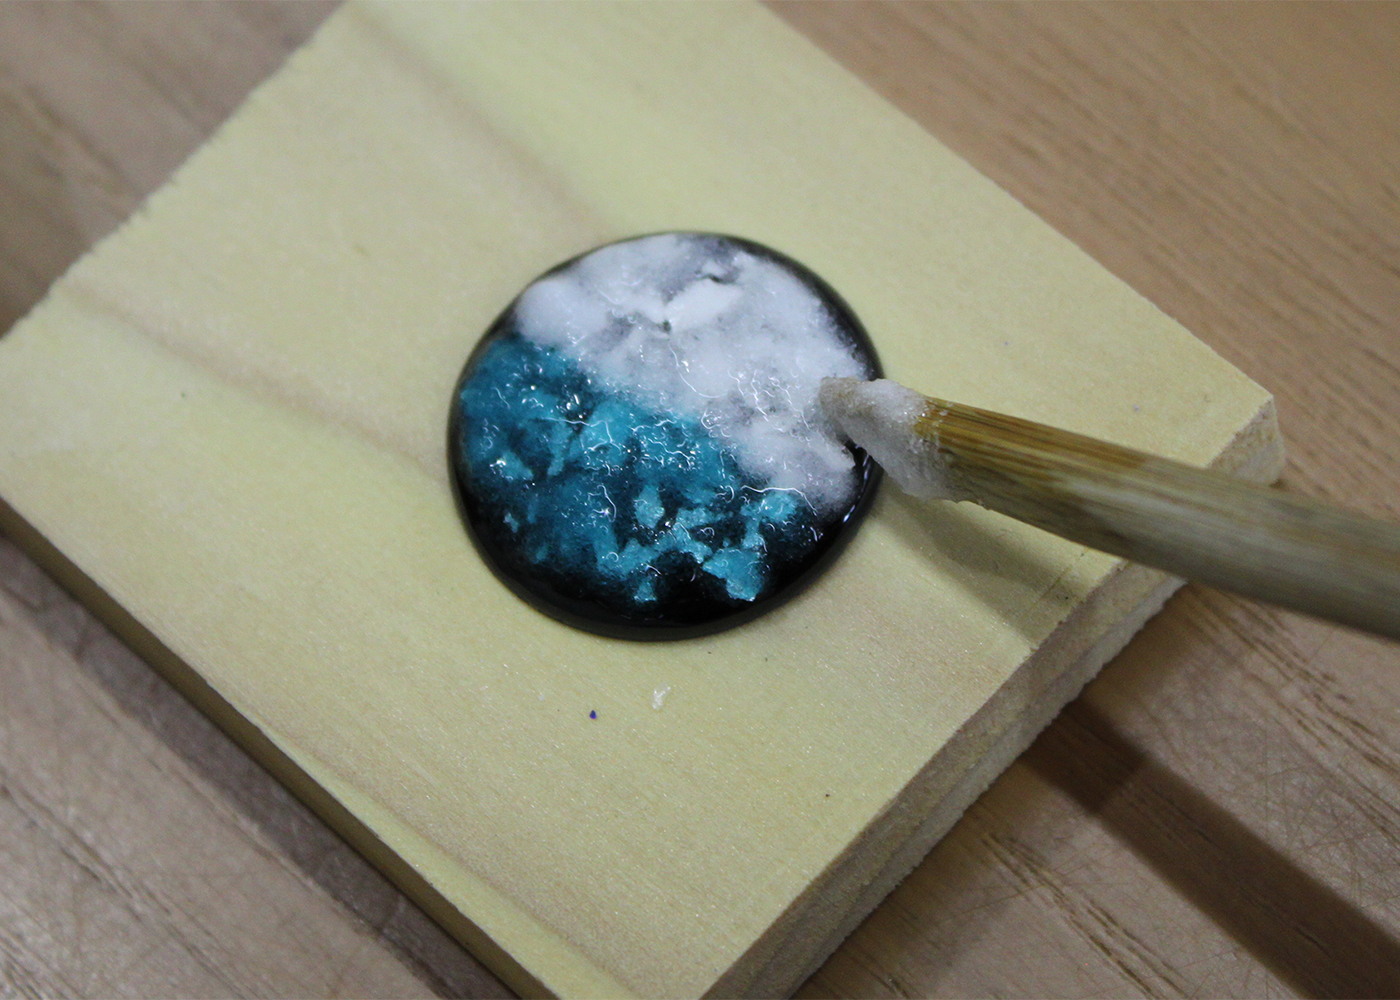
First of all, if the surface of the copper plate is dirty or oily, it is difficult to spread the glaze well, so apply “solvent degreasing solution” to a cotton swab and wipe the copper plate.
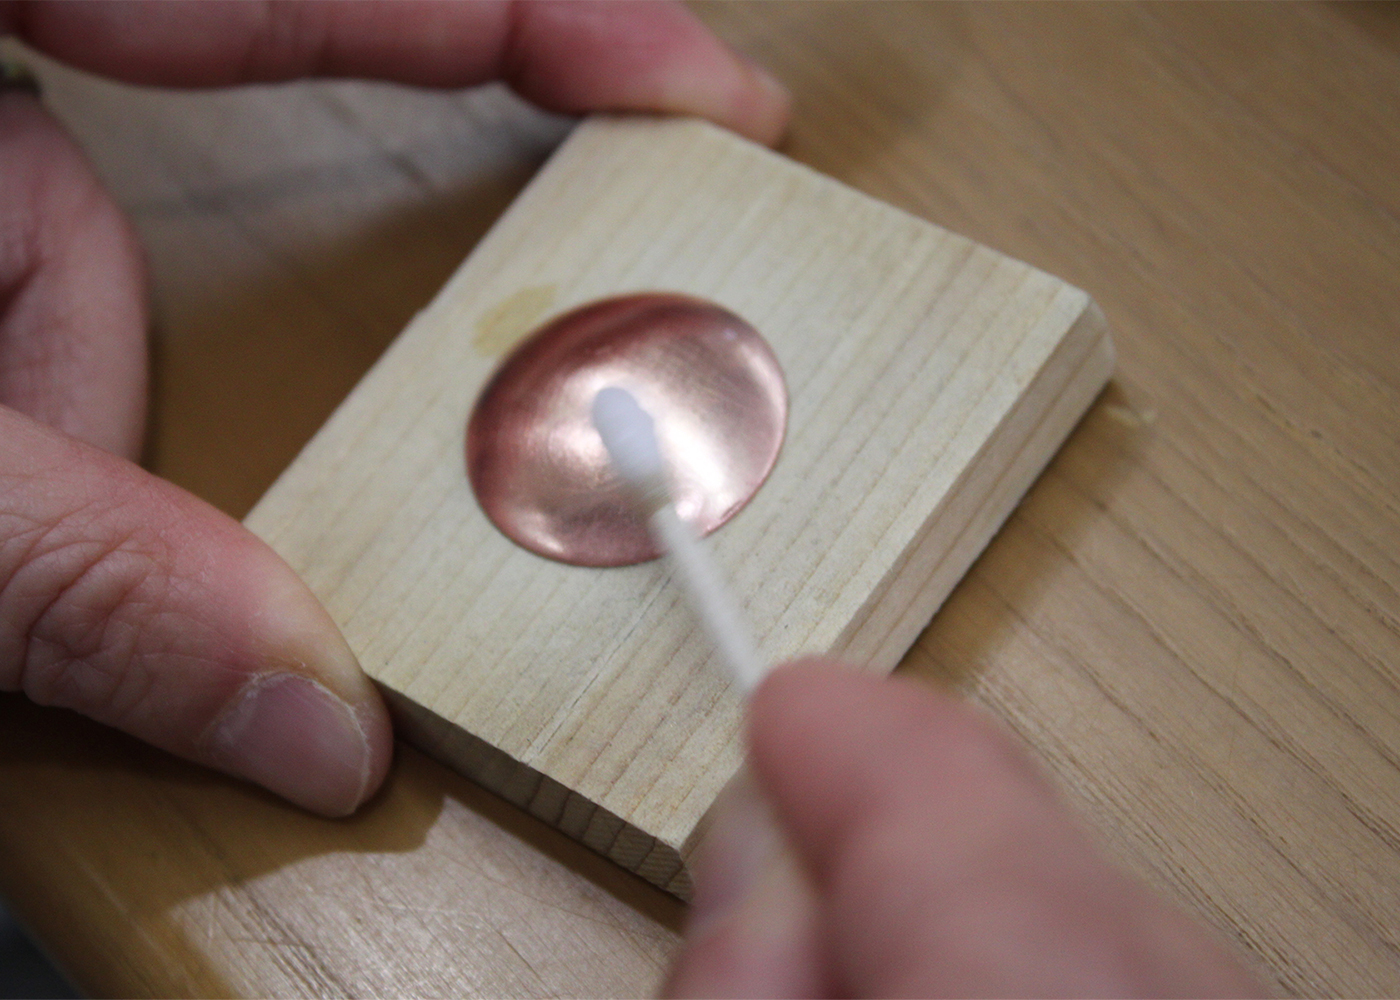
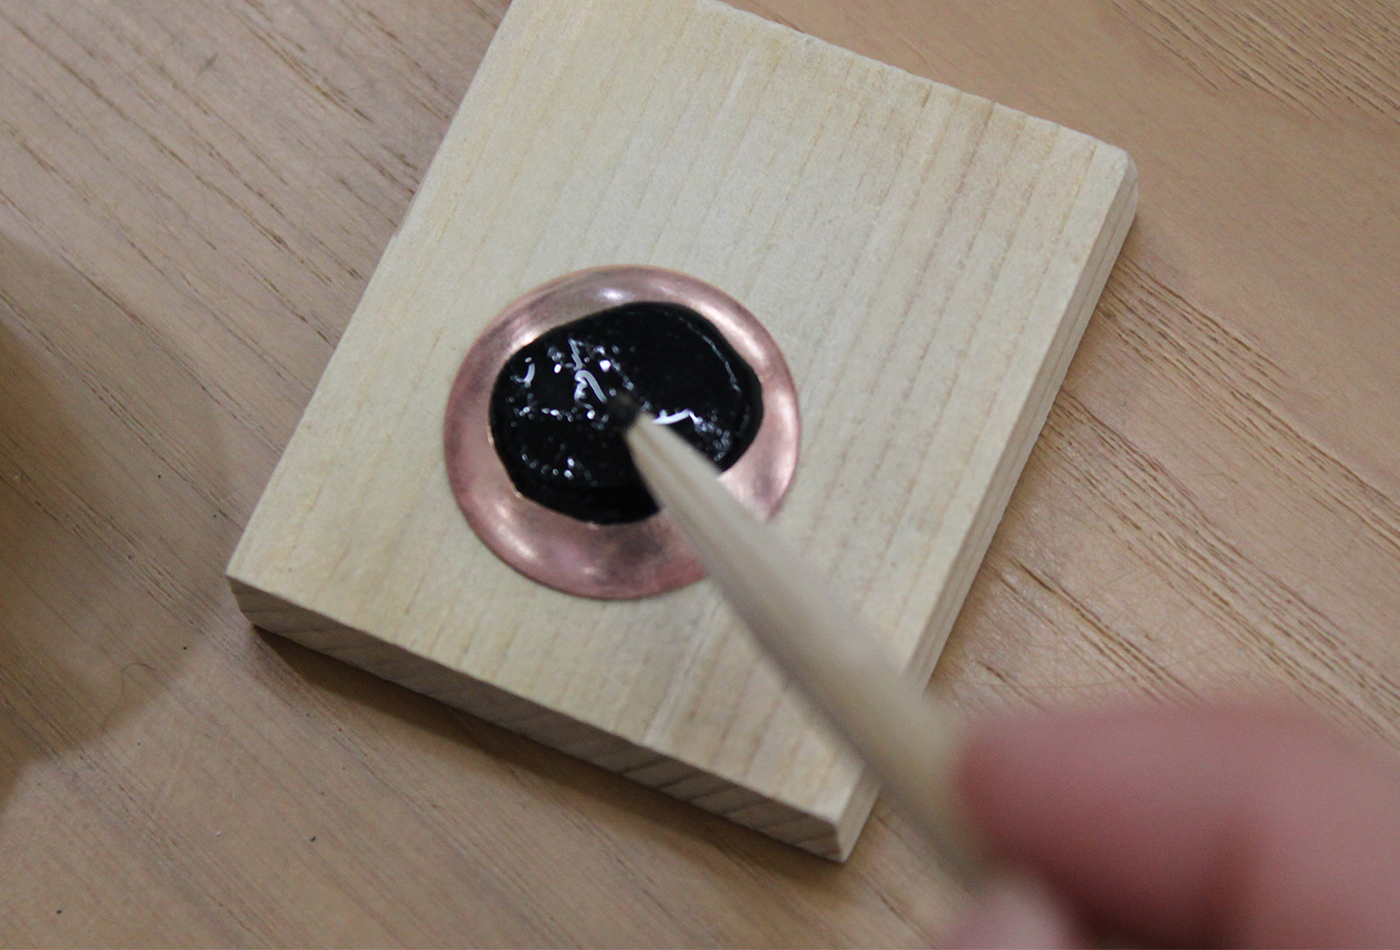
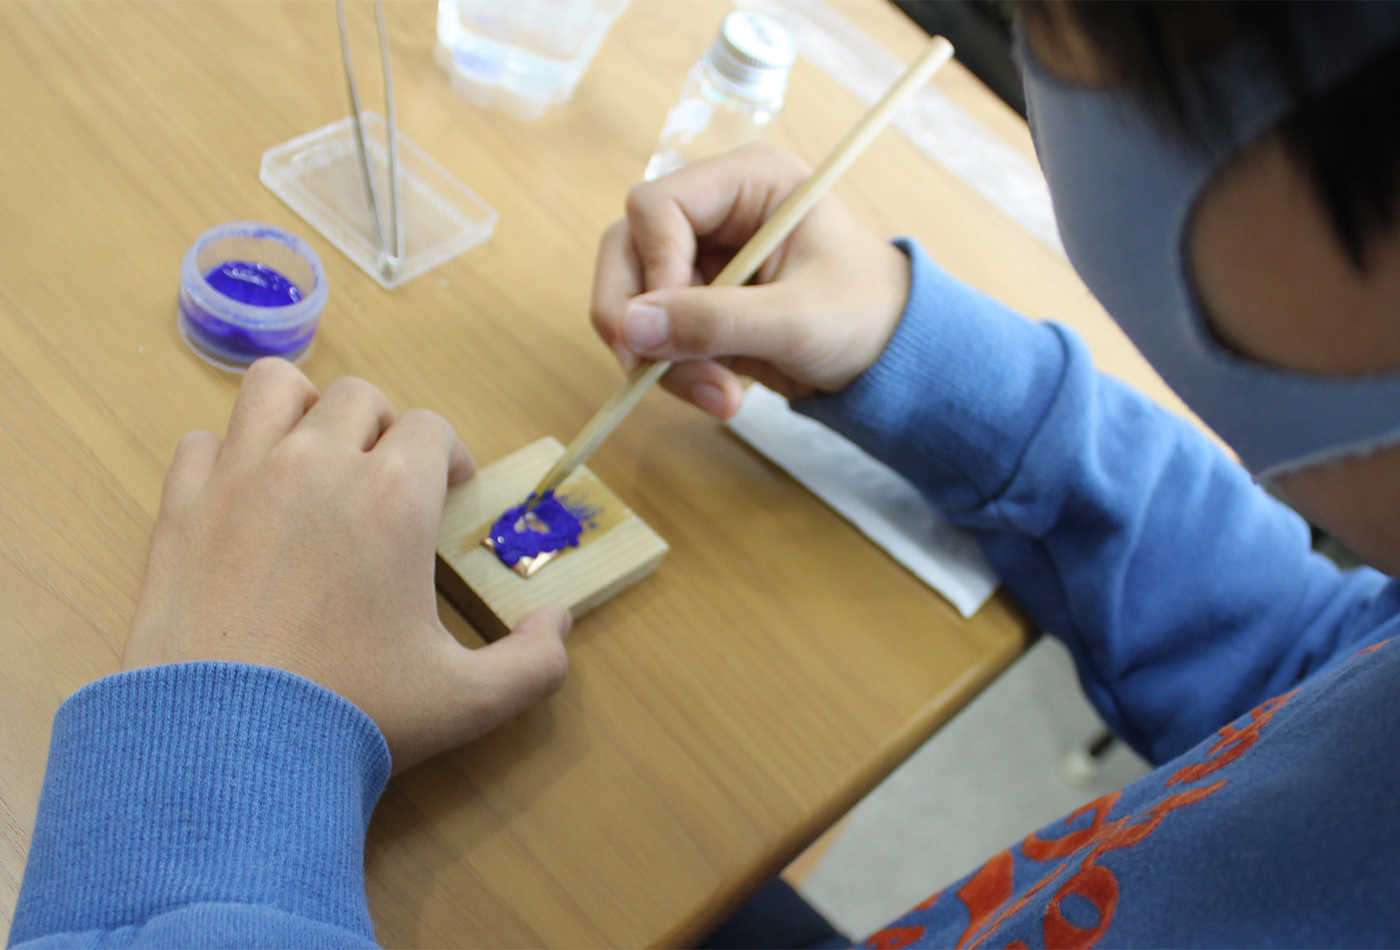
After wiping the entire surface of the copper plate, use a tool called Jose to spread the base glaze.
The teacher will teach me how to use the tools and tips, so this is my first time working, but I feel like I can do it myself!
Concentrate on both parents and children!
It may be difficult for parents and children to experience the first thing together in their daily lives.
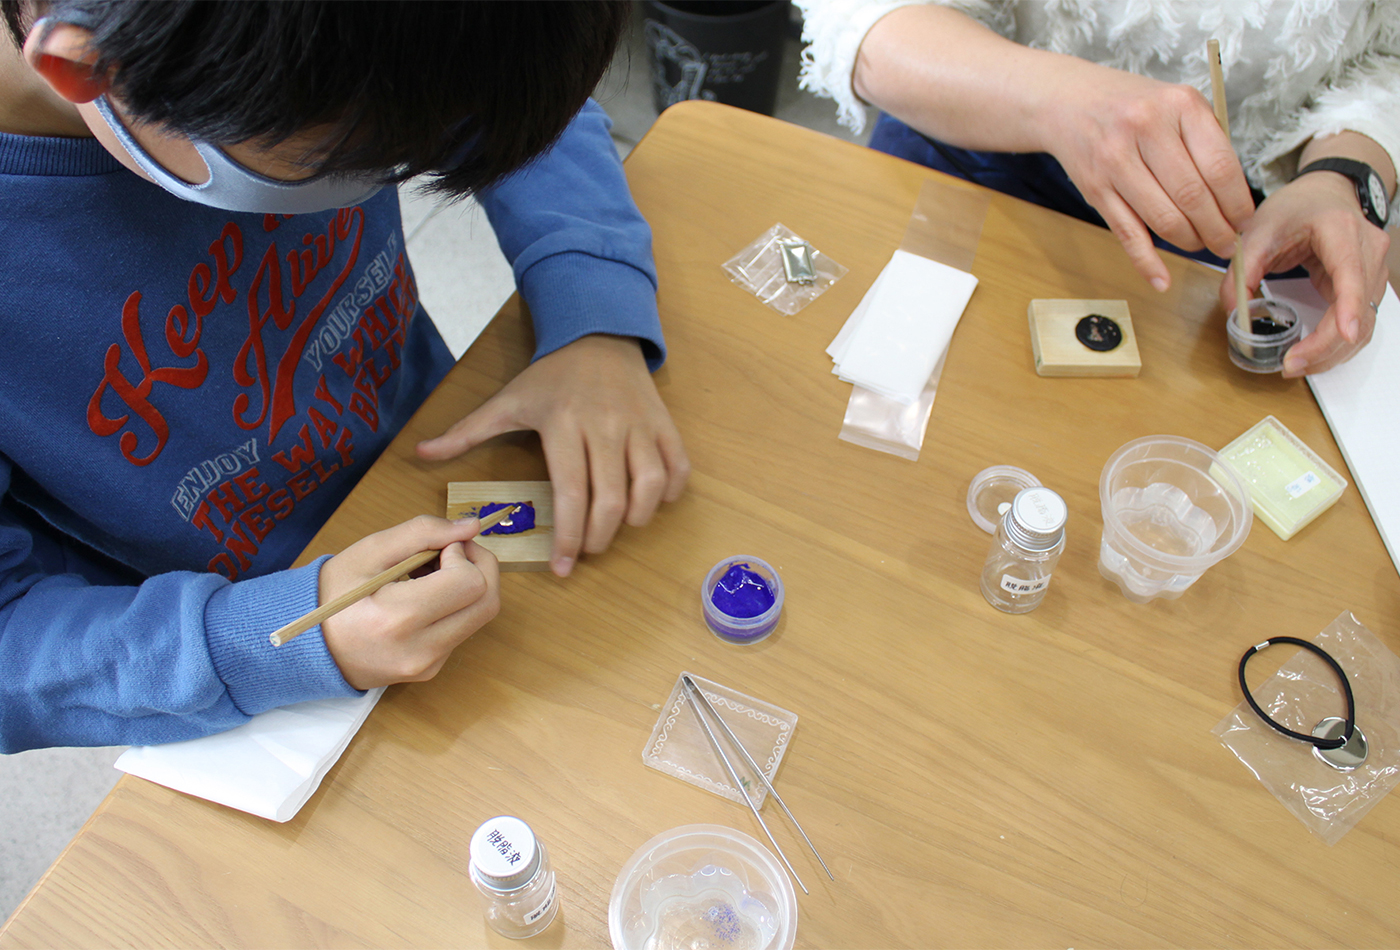
Mr. Sato kindly follows his son, who struggles to create a gap when he stretches it, saying, “Rectangle is actually the most difficult shape. I did my best.”
After filling the base glaze, drip a liquid called CMC, which acts as an adhesive, on top of the glaze.
③ Put frit / silver foil on the glaze
From here, we will start different tasks for each course.
[Frit method]
First, choose a frit to put on the base.
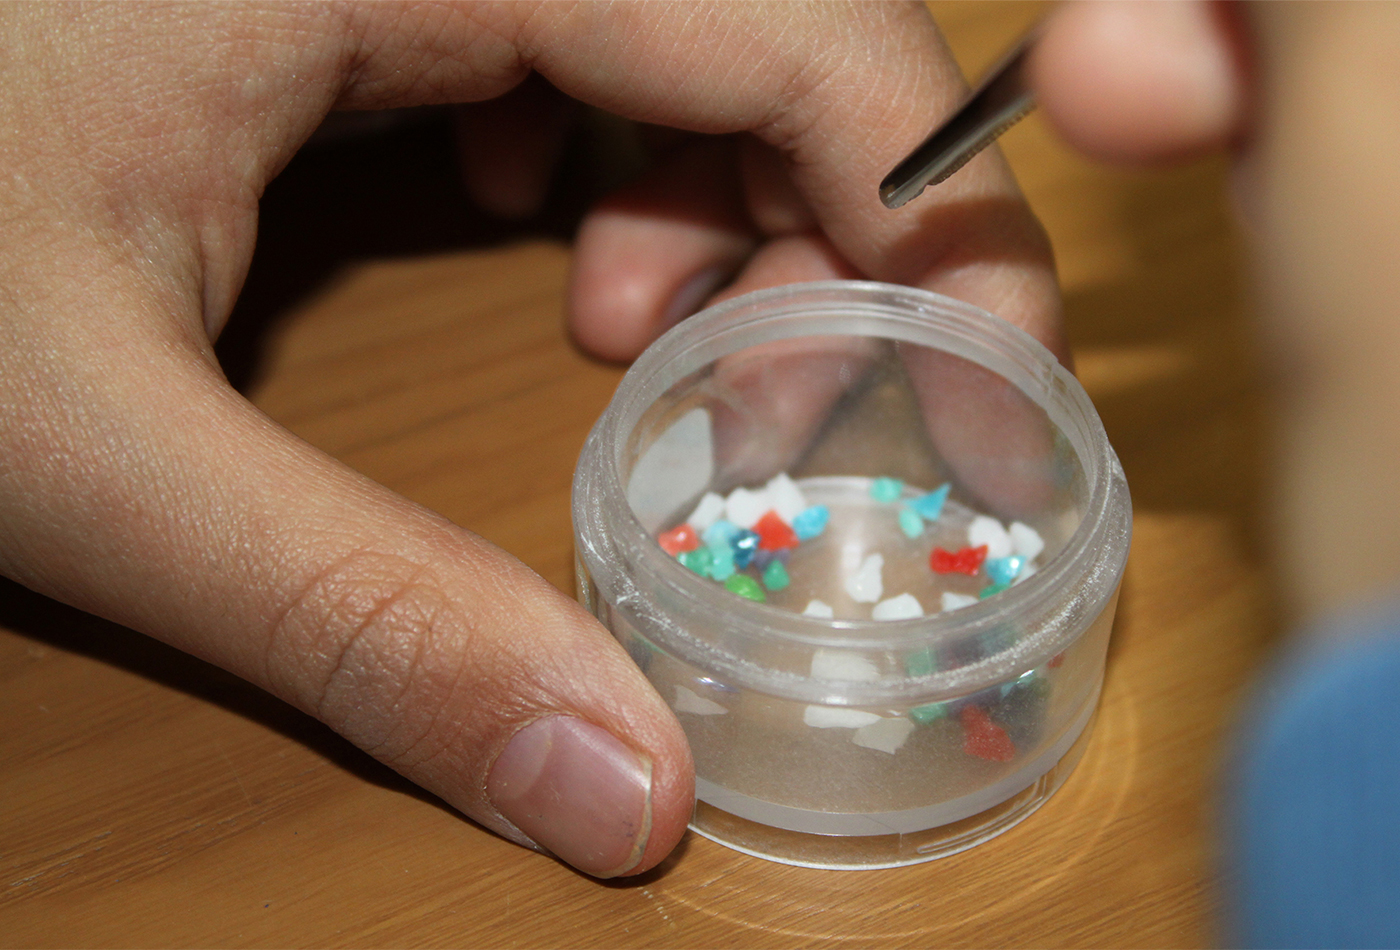
There are three types of frit used in the experience: “opaque,” “semi-transparent,” and “transparent.”
My son chose a blue base, so I got advice from the teacher that it would be difficult to see after firing if it was transparent, so I decided to choose between opaque and translucent frit.
Once selected, the frit is placed on top of the base glaze.
It is a detailed work to carefully place and adjust the frit.
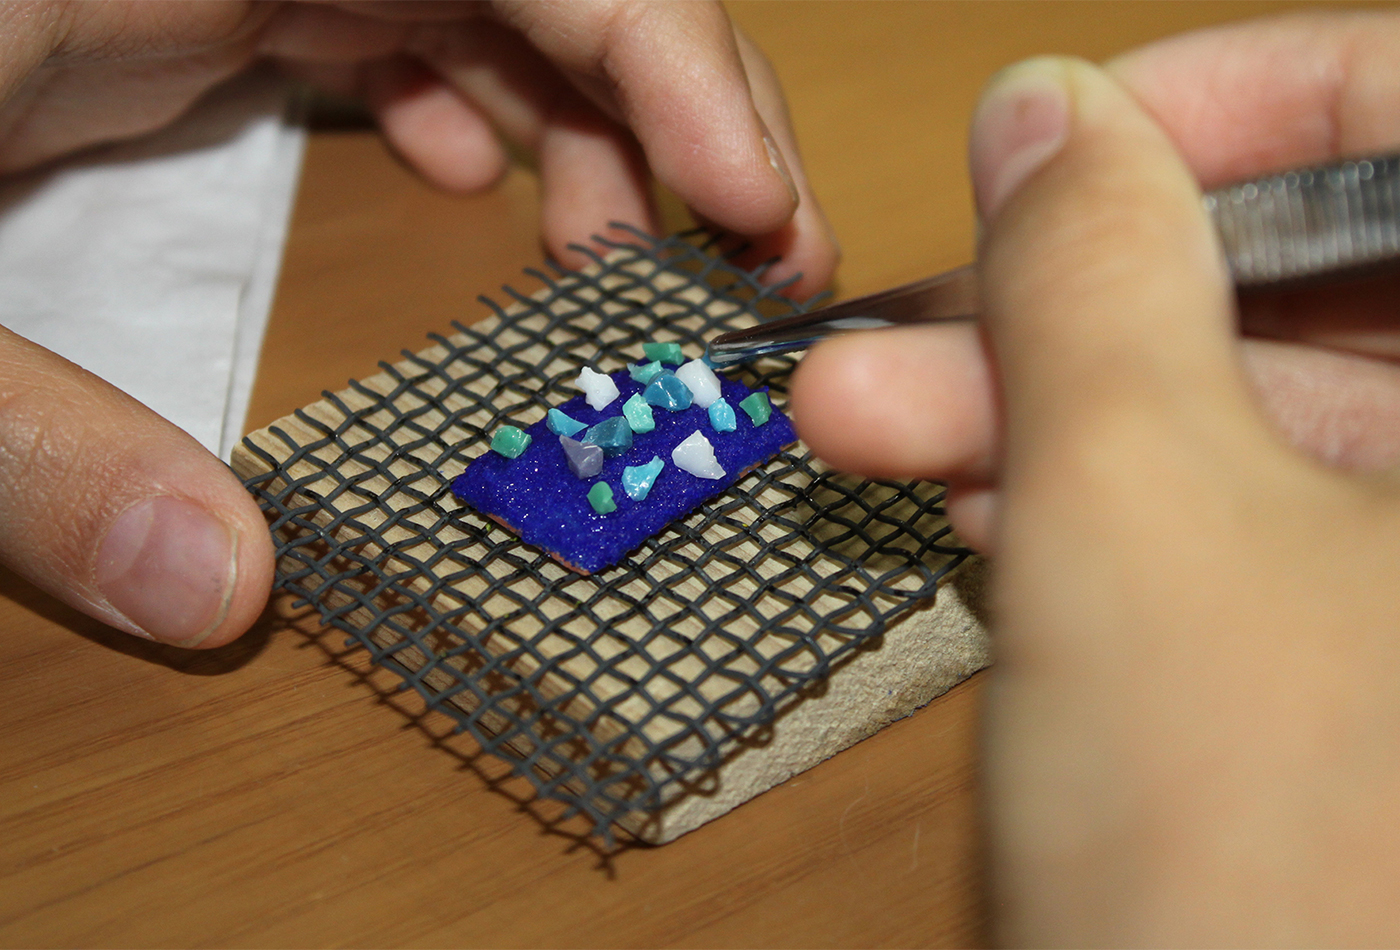
After placing the frit, place it on the electric furnace for a while to dry.
[Cut silver foil method]
Place the silver foil on the prepared base glaze.
As with the glaze, first place the silver foil in the center.
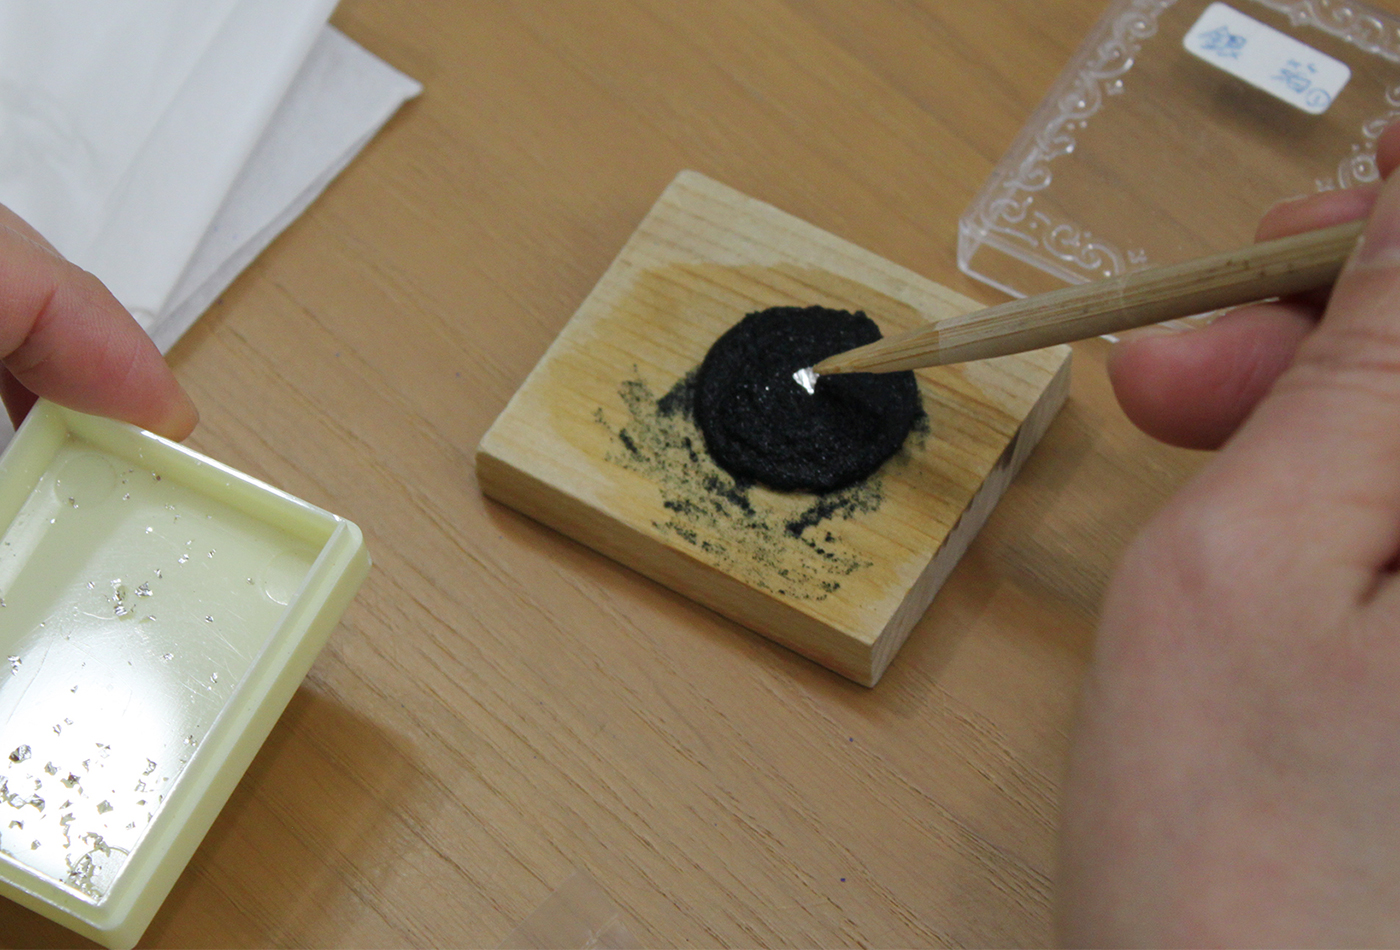
According to the teacher, if you put out the silver foil, you will keep doing it all the time and you will not know where to end.
At first, I should have placed the silver foil while looking at the balance, but as the teacher said, I wouldn’t stop wanting to put more silver foil on it.
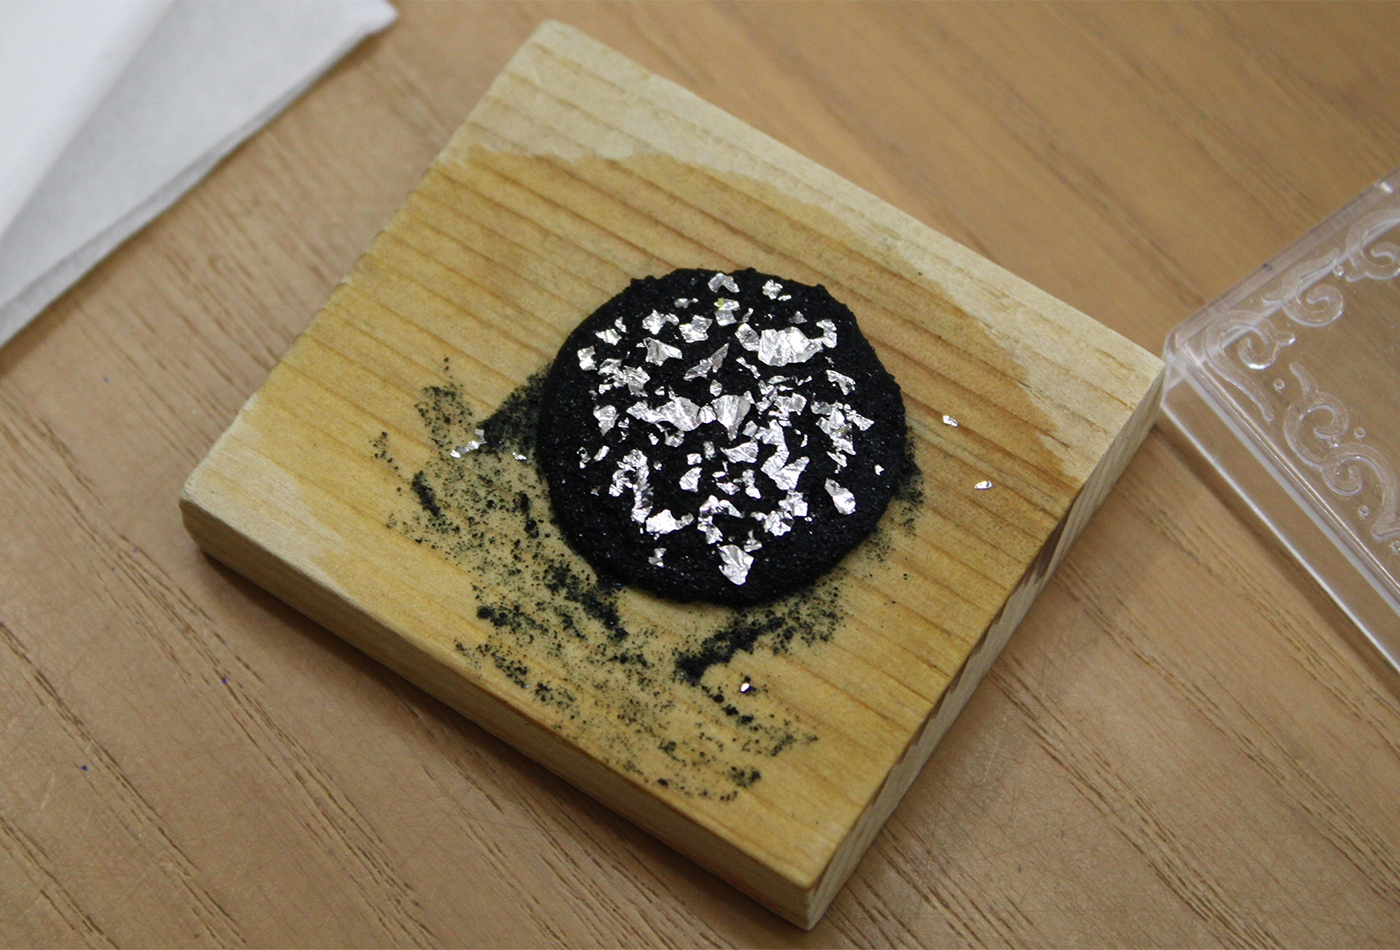
It is better not to put silver foil on the edge of the mold about 3 mm, so it ends around here.
By the way, next is the climax of the cloisonne firing experience — firing in an electric furnace.
④ Firing and finishing
First of all, the teacher will show how it is done.
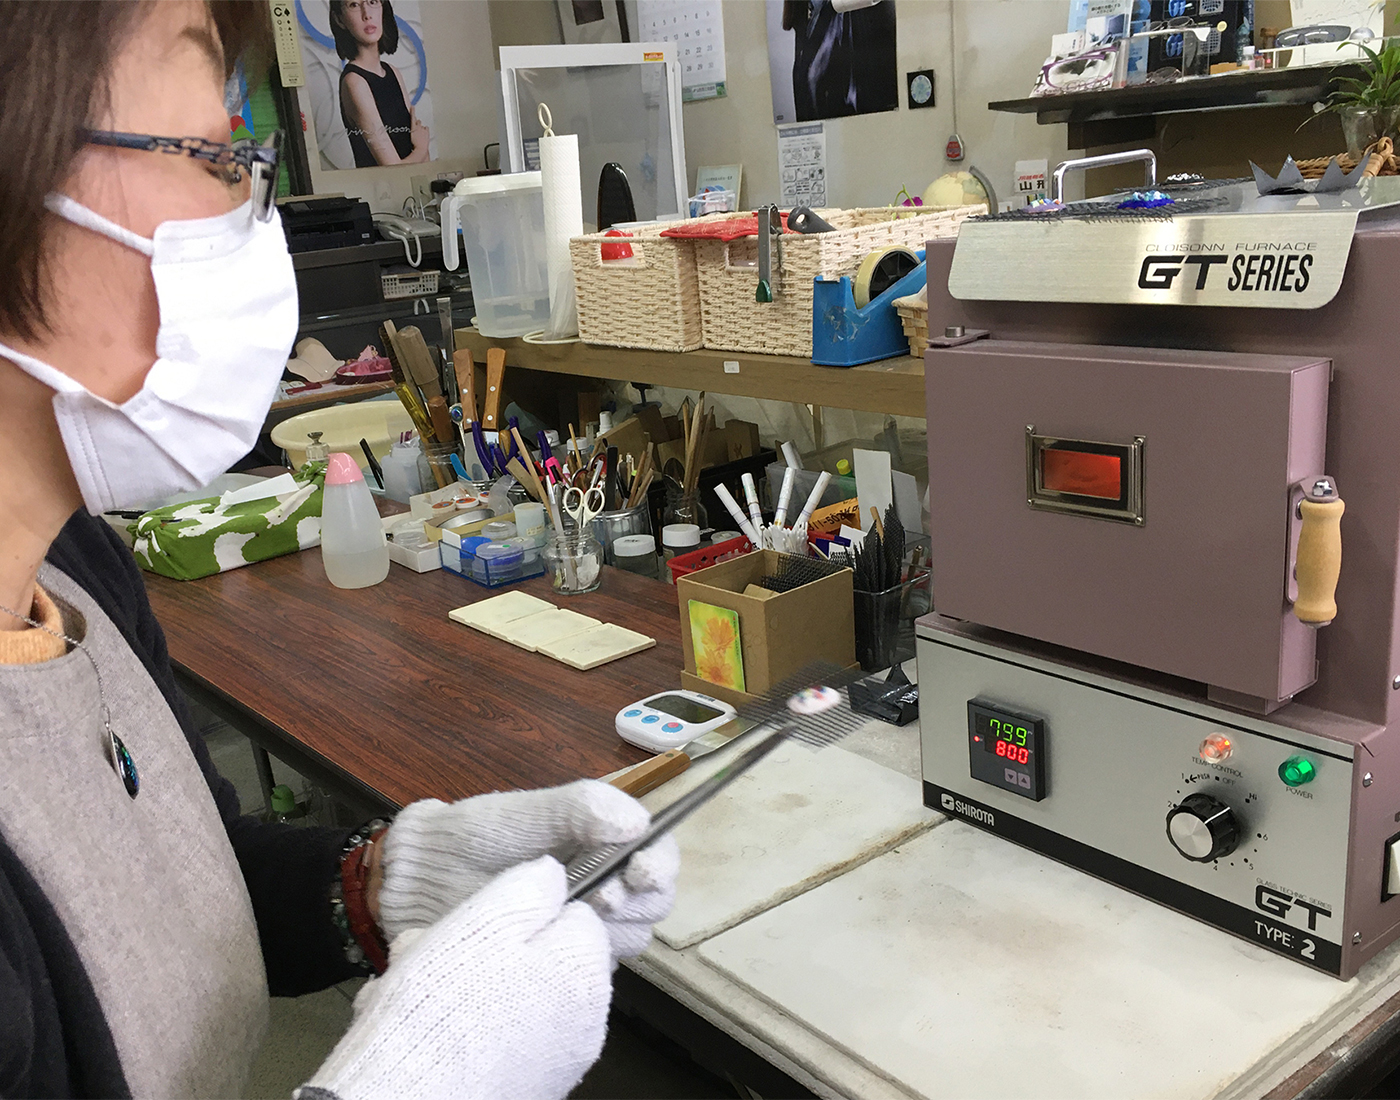
The teacher teaches all the processes while showing a sample, so I feel very relieved.
The temperature of the electric furnace is 800℃!
Looking at the situation from the small window, there is no change for the first 30 seconds, but the glassy surface gradually changes.
[Frit method]
Next is my son’s turn.
The temperature inside the electric kiln is as high as 800°C, which is a temperature that cannot be experienced in normal life.
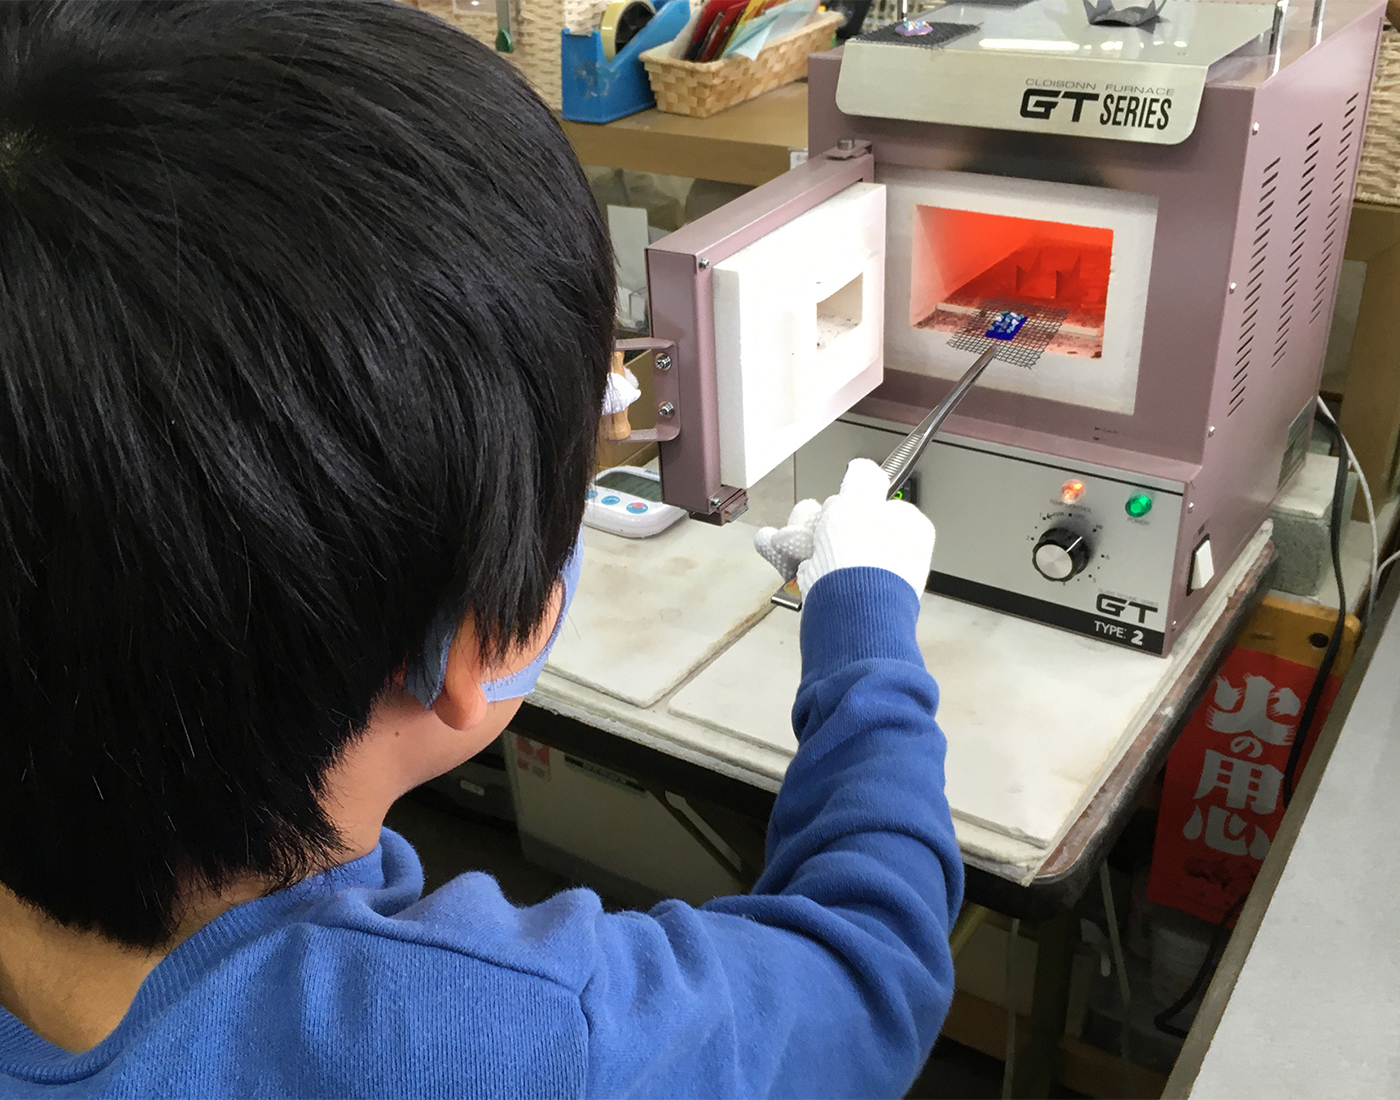
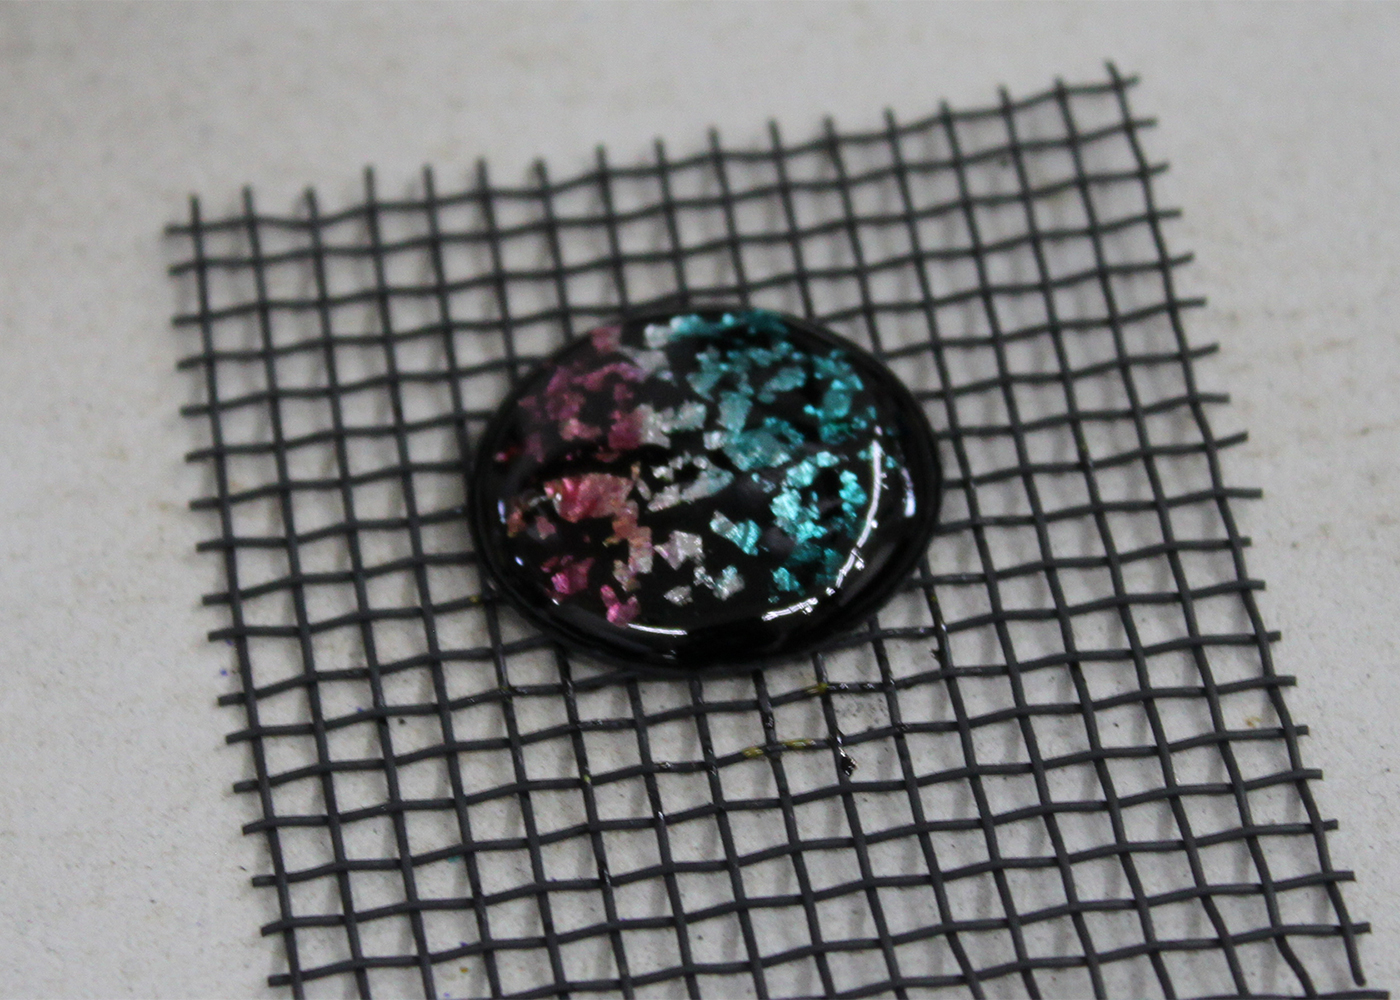
I put his piece in the electric kiln while chattering according to the detailed voice of the teacher’s movement, and after 1 minute, I confirmed that the frit had melted so I took it out. What was heated and bright red turned blackish and finally blue. It’s so funny that the color changes so much in a short time of about 1 minute… Cloisonne enamelware is impressive! Even though I’m making crafts, I feel like I’m experimenting with chemistry. [Cut silver foil method] Immediately after the first firing, press the surface with a spatula or tweezers so that the silver foil on the surface does not fluff. The surface has become glossy! It is very beautiful even when it is fired once, but with the cut silver foil method, glaze is added on top of this. While looking at the sample, choose the finishing glaze. The glaze of coral ruby is white when it is powdered, but it turns red when baked. When I heard the teacher’s words, “I want to see it!”, I decided on three colors: (2) patina, (6) silver scale (clear), and (5) coral ruby. The copper plate with the three colors of glaze looks like this. I am looking forward to seeing what it will look like when fired.
By the way, my son said, “It was the hottest thing in my life so far…”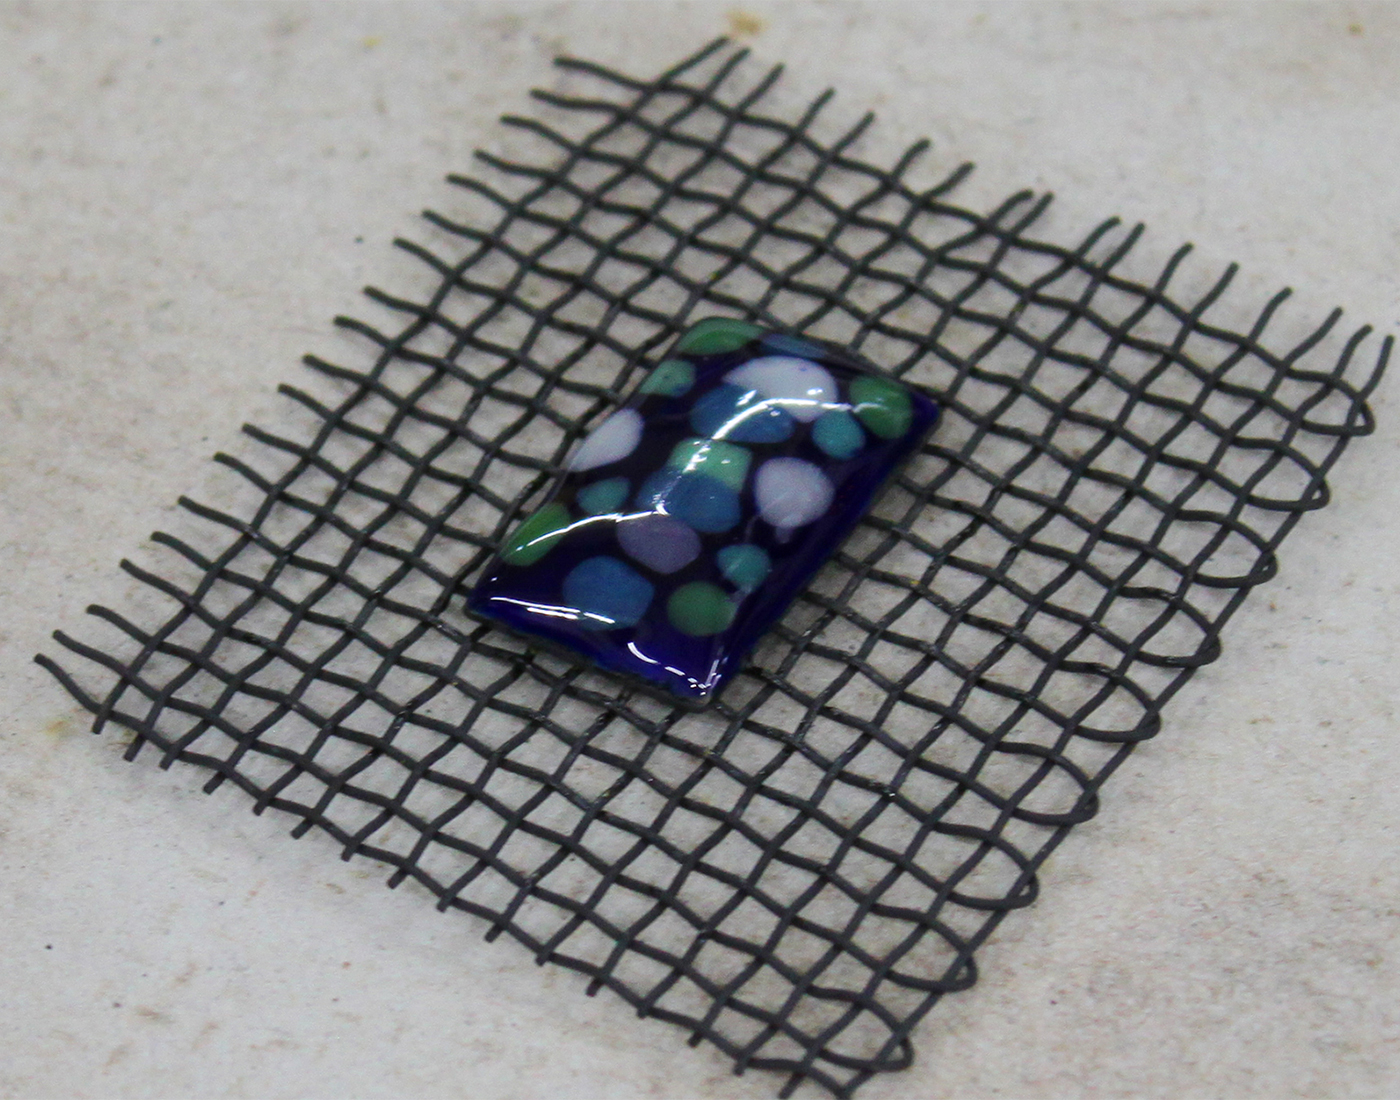
The cut silver foil method has the piece fired twice.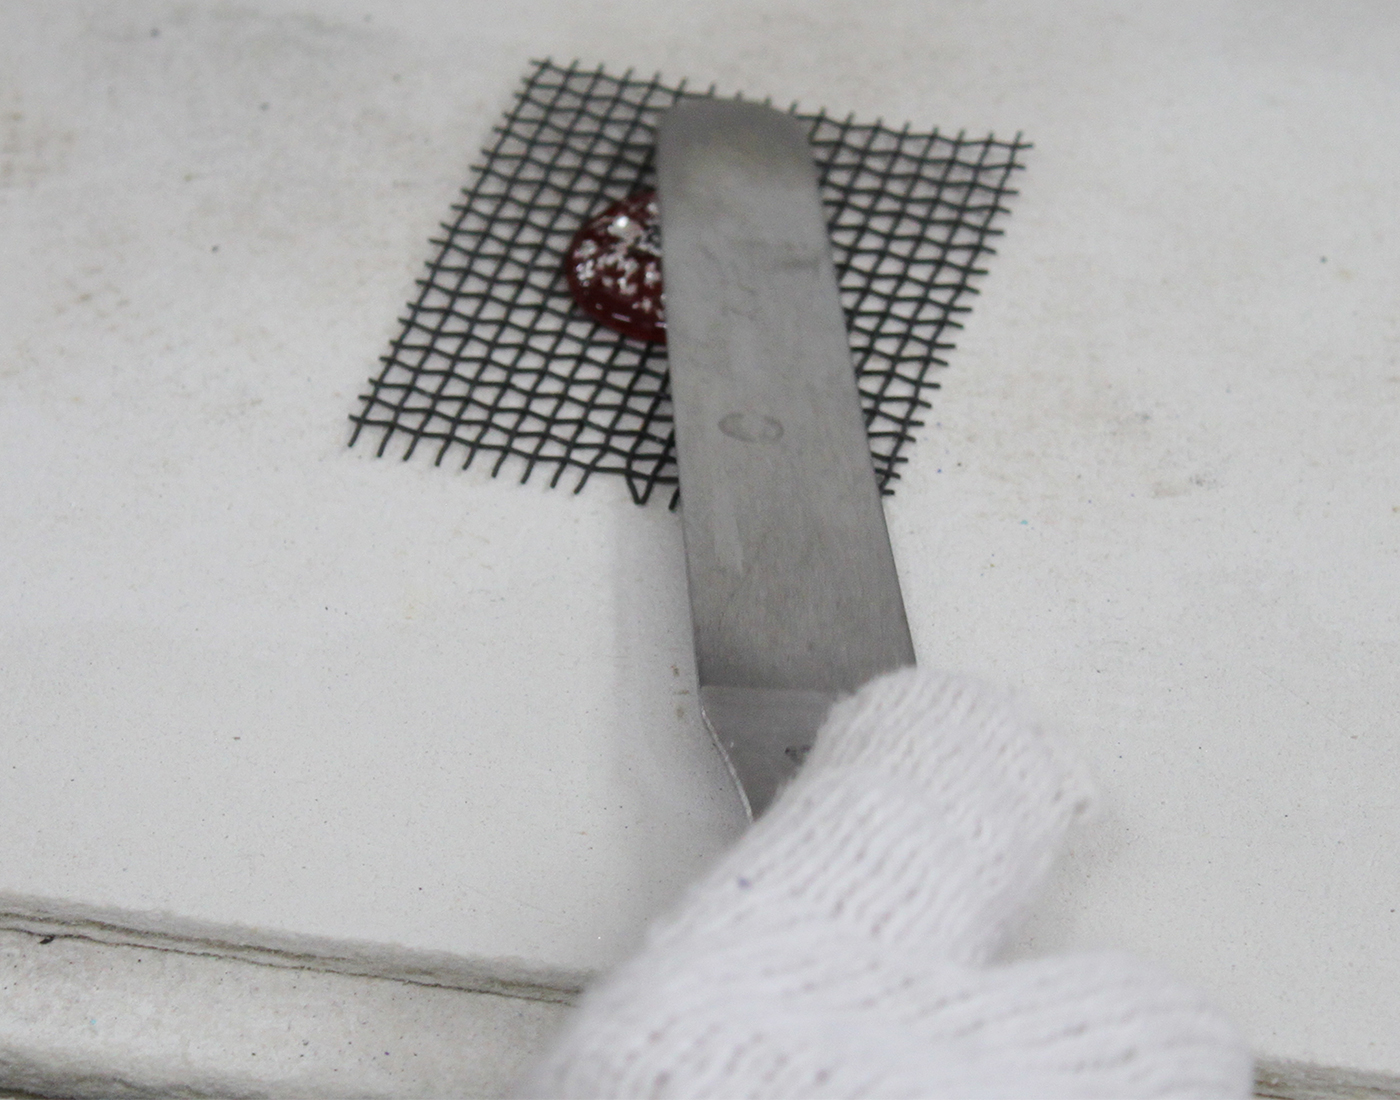
Then, it seems that only the silver foil part is colored. The right side is a sample
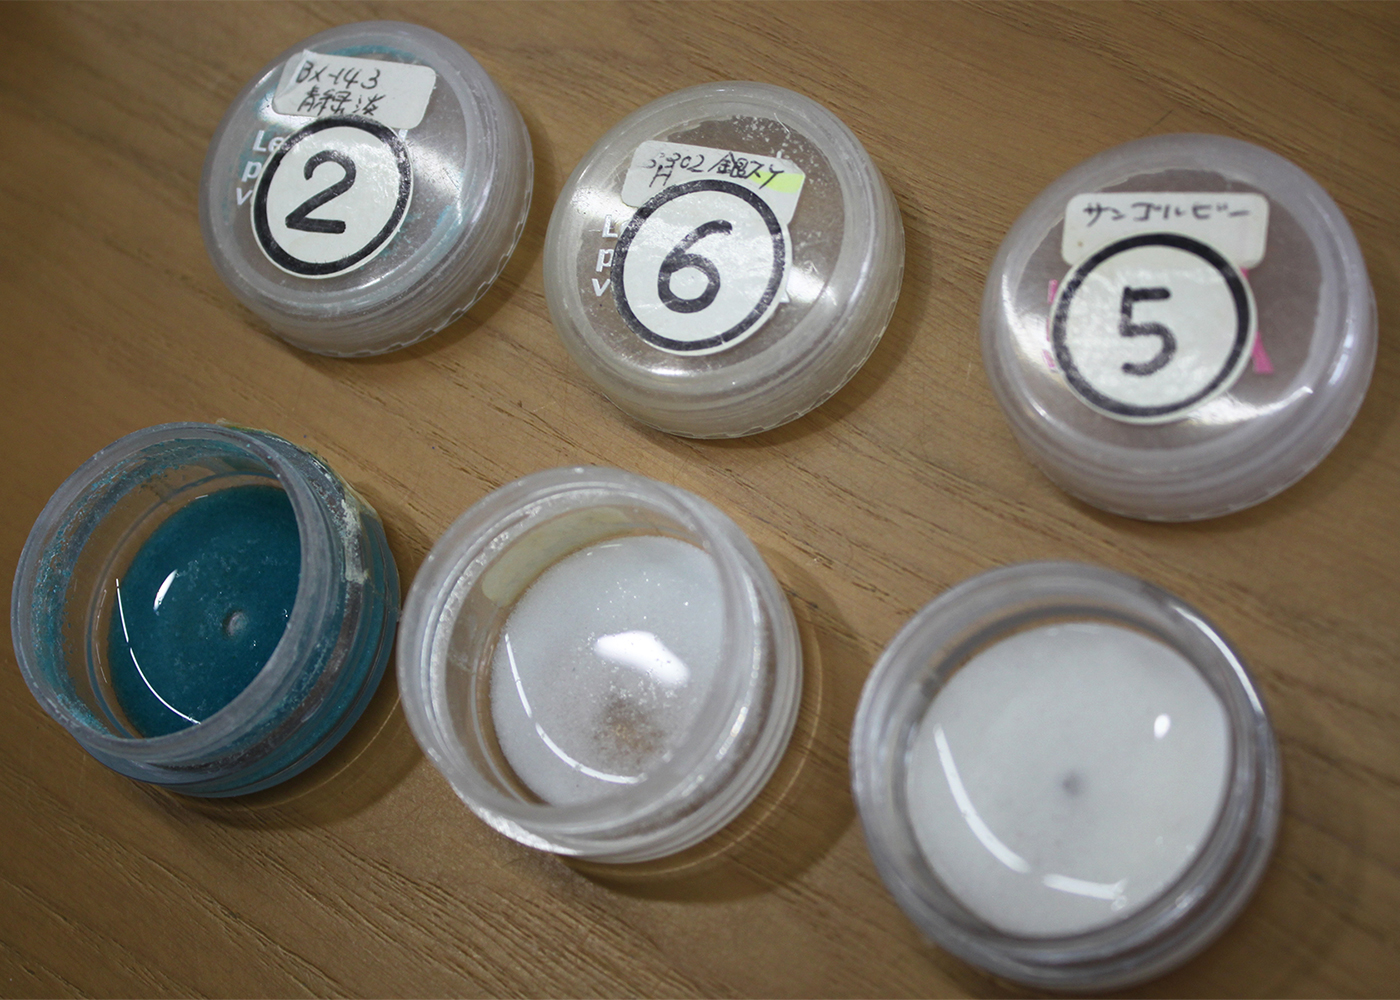
And finally the second firing.
Fire your piece in the electric kiln for 1 minute then take it out…
The color of the glaze that turned bright red due to heat will change steadily!
Somehow mysterious.
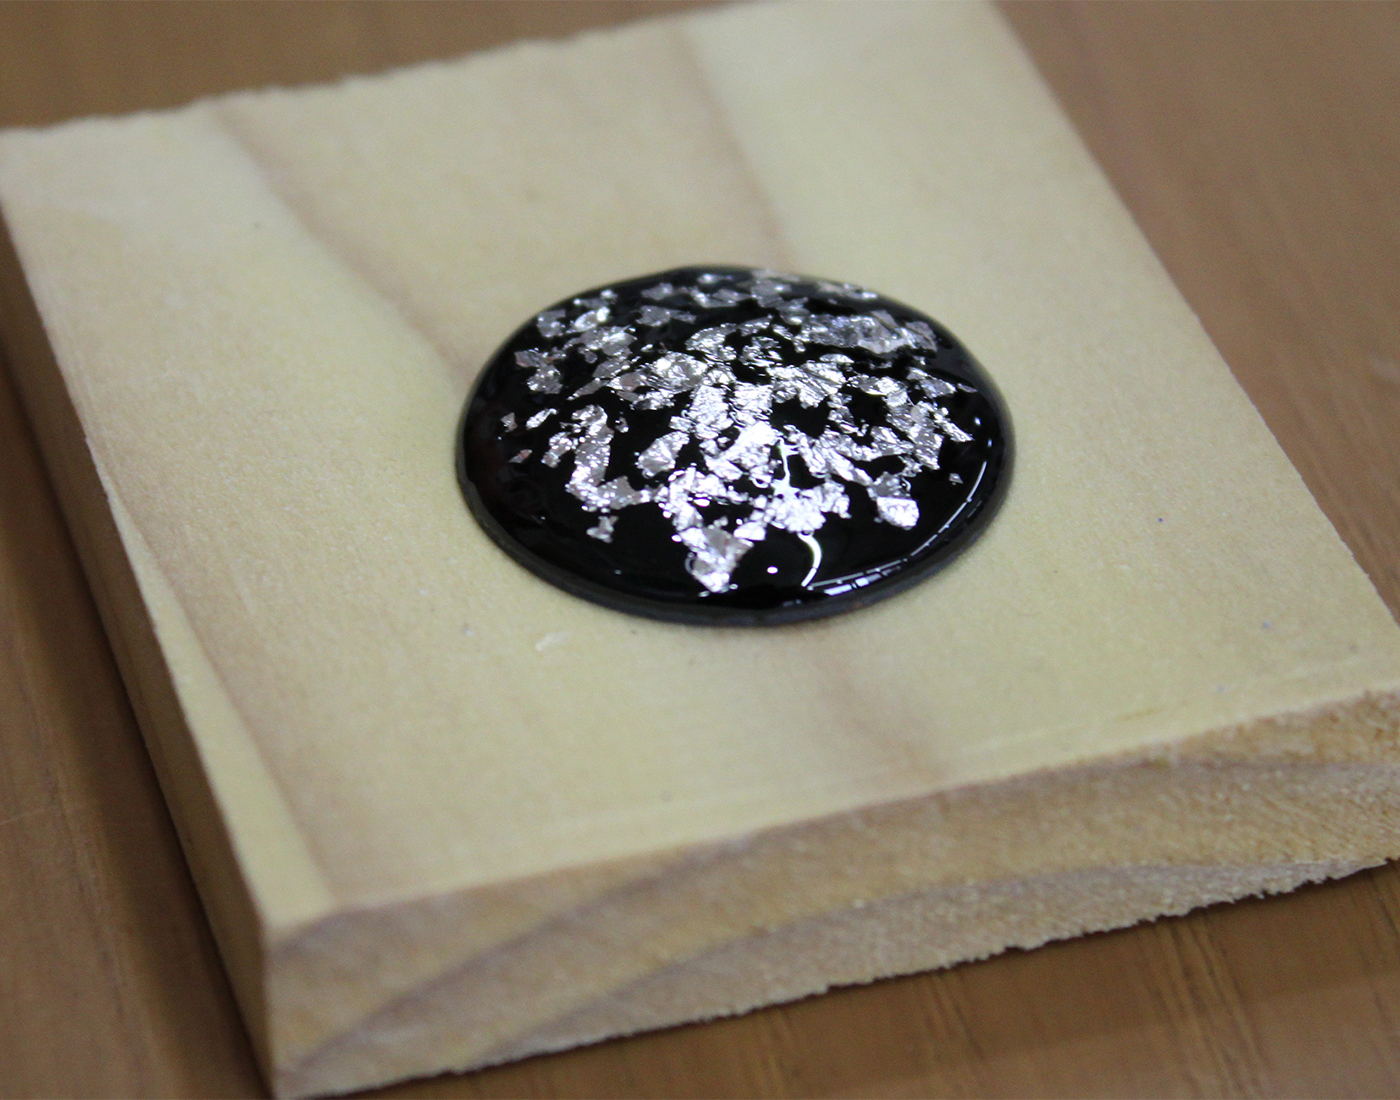
In the end, it became such a shade.
The finish is more beautiful than I had imagined, and I was impressed!
⑤ Attach the parts and complete
Finally, we attached the accessory parts to the copper plate, and that’s it!
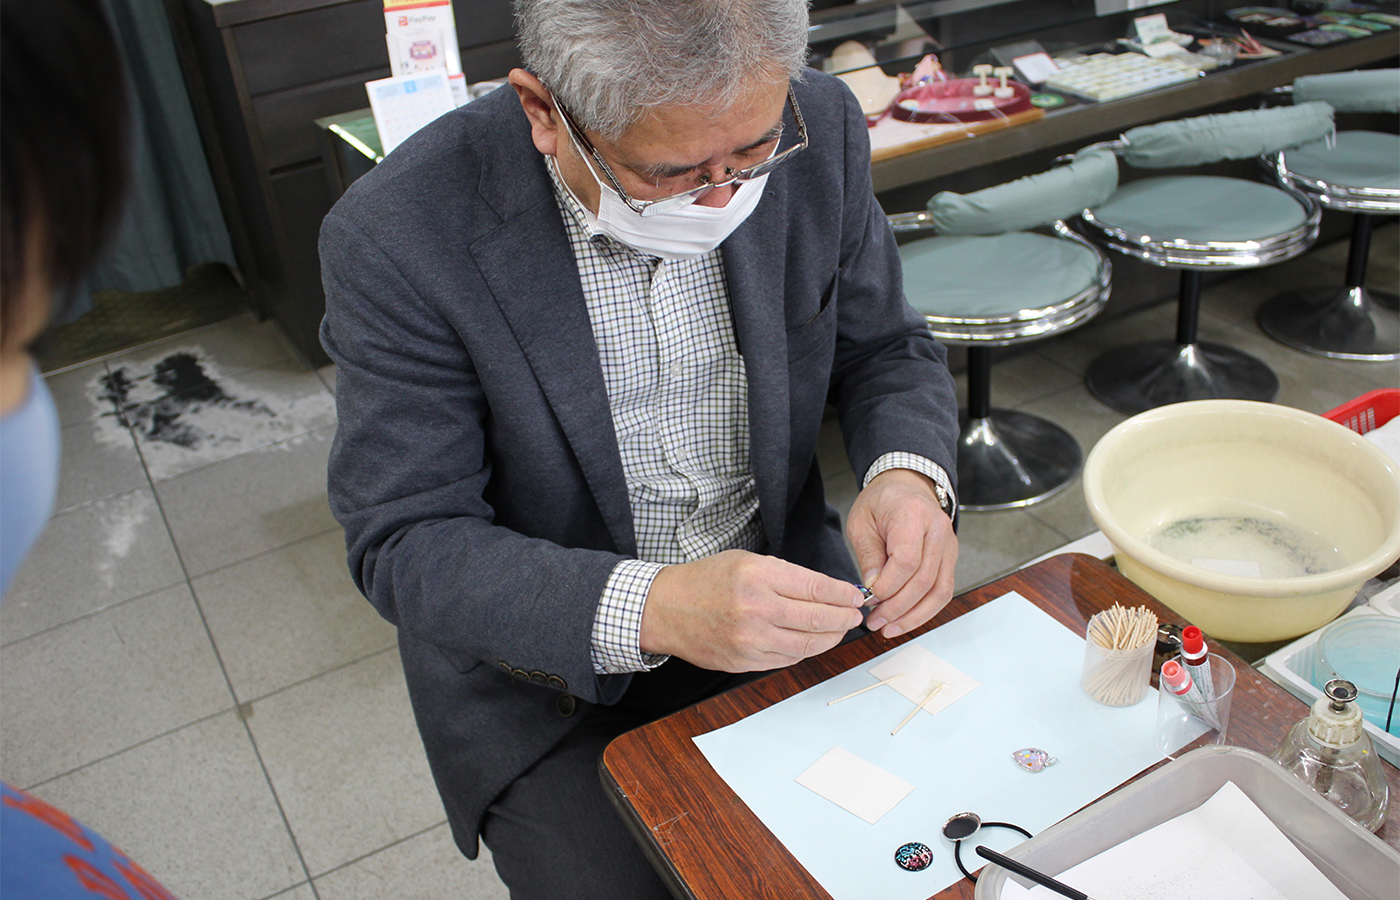
My son processed it into a necklace and I processed it into a hair band.
It was my first time to make cloisonne enamelware, but each one made a wonderful work.
“It was fun” and my son was very satisfied!
Summary
A little interview with the teacher
Sato-san is active not only at this workshop but also other places such as public halls.
After the experience, I asked again about the charm of Cloisonne enamelware.

— What kind of thoughts do you have for the experience class for Cloisonne enamelware?
Cloisonne enamelware is not limited to accessories, but I hope that it will be incorporated as a color in daily life so that you can use it as much as possible.
— Cloisonne enamelware is really beautiful, isn’t it?
Cloisonne enamelware glaze does not mix like paint. That’s why there are as many glazes as there are colors.
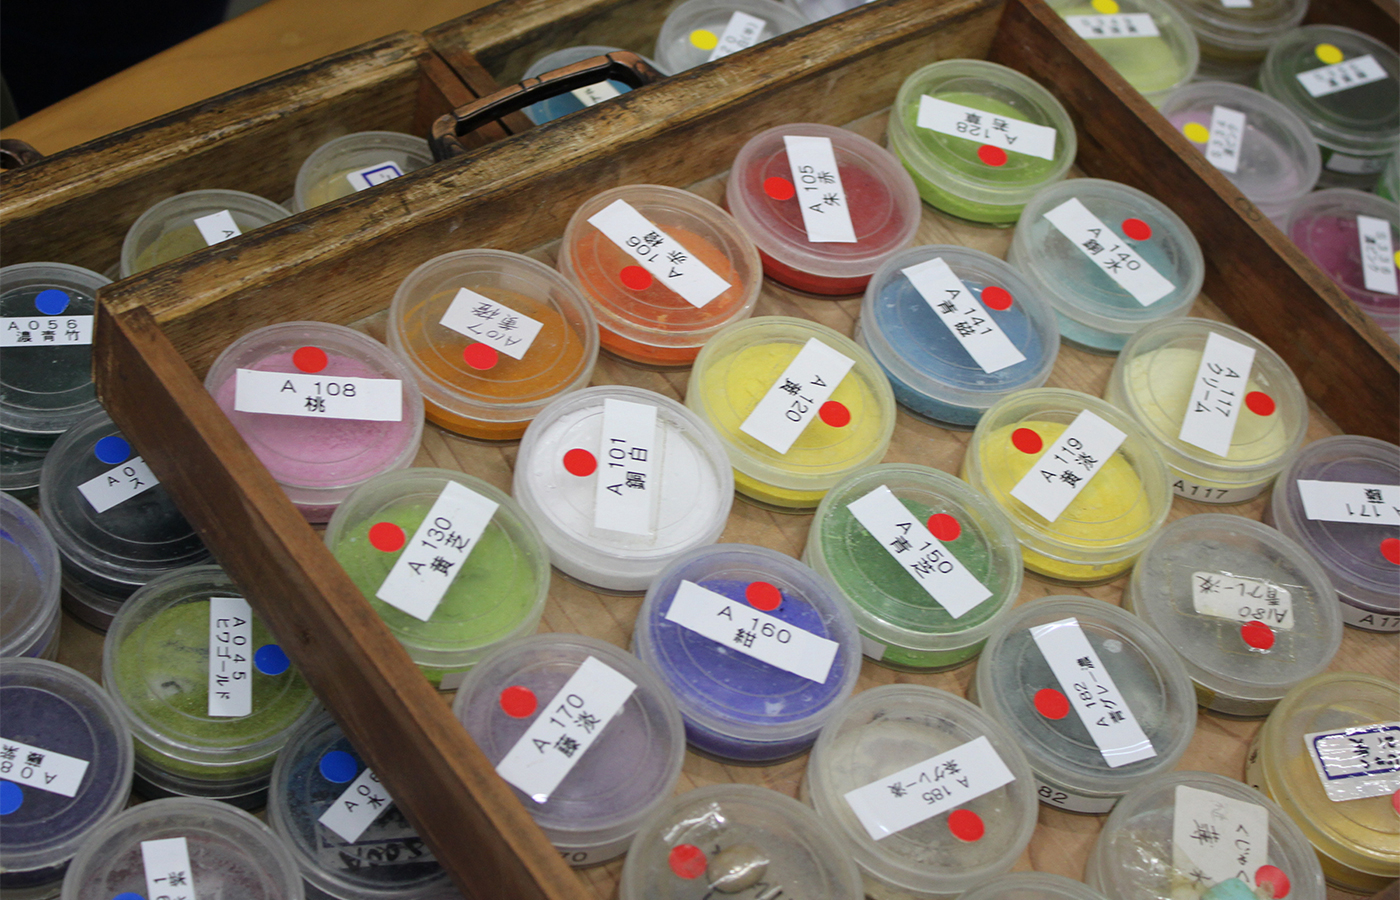
(There are a lot of glazes in the drawer. Even this is only a small part.)
— The more you listen to the story, the more you will be amazed at the depth of Cloisonne enamelware.
Everyone is really surprised at the changes when making cloisonne enamelware, especially when it is taken out of the kiln. That is where we are most impressed.
It’s also a nice attraction to have a quiet time when no one talks to anything and a sense of unity that we did something together. All the results will come out in about an hour and a half, so I hope you will have a good and condensed time. I’m most happy to hear that it was fun!
— No, it was a lot of fun!

This cloisonne enamelware experience allowed me to concentrate on my work and spend some exciting time after a long absence.
It was also a valuable experience for parents and children to have their first experience together.
Thank you very much to Mr. and Mrs. Sato for kindly and politely teaching us today!
Click here to make a reservation
★ Benefits only for those who make a reservation from VISIT YAMAGATA ★
You can choose one of the following:・ +1 accessory part will be presented
(Example: If you make a pendant, you will receive a replacement part for a strap or key chain)
・ We will give you a 100 yen discount coupon that you can use the next time you use it.
[Experience fee]
■ Frit method 1,600 yen (tax included)
■ Cut silver foil method 2,100 yen (tax included)
[Experience time]
■ Frit method 10:30~12:00
■ Cut silver foil method 13:00~14:30
* For the time being, the frit method will be accepted only in the morning and the cut silver foil method will be accepted only in the afternoon.
[Time required]
About 1 hour 30 minutes
[Target age]
10 years old and above
[Number of people who can experience]
1~2 people
* For the time being, the maximum number of people who can experience COVID-19 infection at one time is two.
[Open]
Monday, Wednesday, Friday, Saturday
[Payment method]
Cash only
[Handing over the work]
You can take out on the day of the experience
[Items to bring]
There is nothing in particular, but it will be a detailed work, so please bring glasses if you need some.
[Venue]
Shonai-ya Kobo Kujaku
[On foot] About 15 minutes from Yamagata Station
[By bus] About 3 minutes on foot after getting off at the “Hatagomachi Yotsuji” Benichan bus stop (loop line)
[Parking Lot]
Yes (for 2 cars in front of the store)
[Request for COVID-19 infectious disease countermeasures]
・ Please refrain from visiting the shop if you are not in good physical condition.
・ Please wear a mask when you come to the shop.
・ Please cooperate with hand sanitizer with the provided disinfectant after entering the store. Please fill in the checklist
・ For the time being, the experience will be limited to those living in Yamagata Prefecture
・ The instructor will wear a face guard as appropriate
(We try to maintain a social distance during the experience, but for convenience of explanation, there may be situations where the distance is close to the customer.)
Detailed information
-
Click here to make a reservation
Experience cloisonne enamelware accessory-making at a workshop in Yamagata City ♫
Why don’t you feel free to make your own original accessories?
![[Feature] Miraini! Sakata Activity Hub](https://www.visityamagata.jp/wp/wp-content/uploads/2024/02/compile-image_1707742235039.png)
![[Feature] Yukotto! Refreshing time in hot springs](https://www.visityamagata.jp/wp/wp-content/uploads/2024/03/yukotto.jpg)
![[Feature] Yamagyu! Enjoy the finest Yamagata beef yakiniku](https://www.visityamagata.jp/wp/wp-content/uploads/2023/01/食レポ-焼肉-桶盛.jpg)
![[Feature] Kaneyama ! Stroll in a retro town](https://www.visityamagata.jp/wp/wp-content/uploads/2023/11/金山めぐり_風景_金山町_①.jpg)
![[Feature] Roadside Station Chokai Furatto! Local food and souvenirs](https://www.visityamagata.jp/wp/wp-content/uploads/2023/10/michinoeki_chokai.jpg)